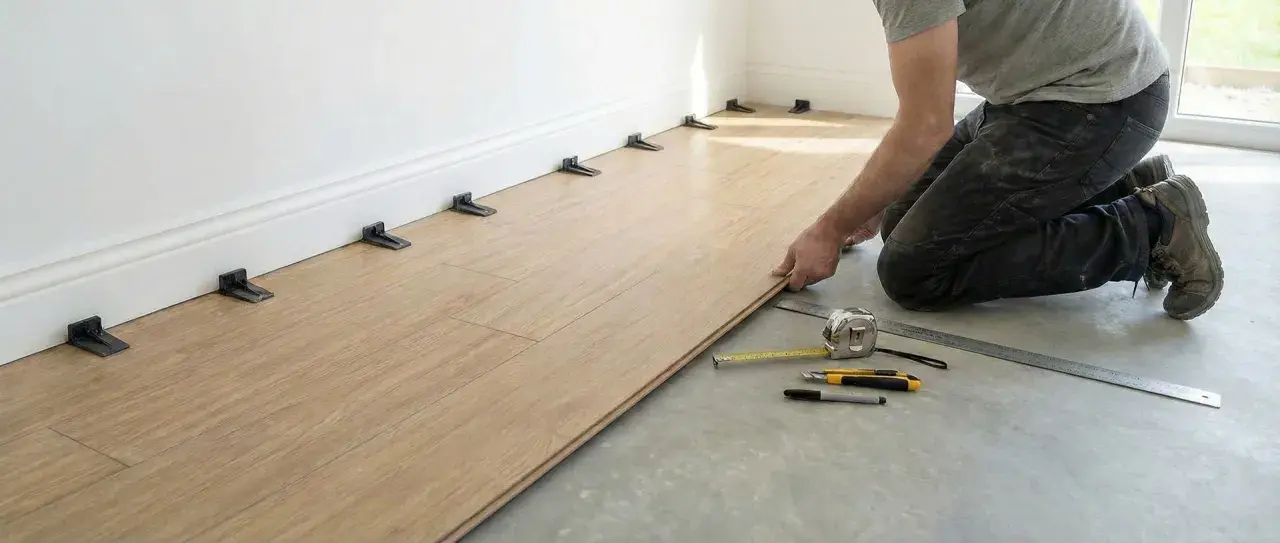
The practical version of a clean vinyl plank install
- A floating click-lock floor is usually the easiest and most forgiving choice for residential projects.
- The subfloor has to be flat, dry, clean, and sound; vinyl plank will not hide a bad base.
- Leave a consistent 1/4-inch expansion gap and undercut door jambs instead of cutting around them.
- Stagger end joints by at least 6 inches, and 8 inches is even better when the product allows it.
- Blend planks from multiple cartons so the color and pattern variation looks natural, not patchy.
- In bathrooms, plan around toilets, tubs, vanities, and thresholds before you start locking planks together.
Which installation method I choose first
For most homeowners, I start with a floating click-lock rigid vinyl plank. It is fast, it is forgiving, and it gives you the cleanest path to a good result when the subfloor is already in shape. Glue-down is the better choice when the product specifically calls for it, when the room gets a lot of direct sun, or when you want a more fixed feel underfoot. Peel-and-stick can work in small, low-budget spaces, but it demands a cleaner, flatter base and usually gives you less margin for error.| Method | Best for | Strengths | Trade-offs |
|---|---|---|---|
| Floating click-lock | Most homes, DIY installs, many bathrooms | Fast install, easier repairs, no adhesive mess | Needs expansion space and a free-moving perimeter |
| Glue-down | Sun-heavy rooms, commercial spaces, low-profile installs | Stable feel, strong bond, good in large areas | More prep, more skill, harder to remove later |
| Peel-and-stick | Small budget refreshes | Low tool count, quick to start | Least forgiving if the substrate is not nearly perfect |
In a bathroom, I am stricter than I am in a hallway. I want a product that explicitly allows the room conditions, the fixture details, and the perimeter treatment I need, because waterproof on top does not mean the same thing as moisture-proof underneath. Once the method is chosen, the floor lives or dies on prep.
That is where the real labor starts, and it is also where most shortcuts become permanent.
Prepare the room and subfloor before the first plank goes down
I would rather spend 20 extra minutes on prep than spend the next five years noticing one lifted seam every time I walk into the room. The floor underneath vinyl plank has to be flat, dry, clean, and sound. Many manufacturer guides land somewhere around 1/8 inch over 6 feet or 1/4 inch over 10 feet for flatness, which is a good reminder that even rigid-core planks are not meant to bridge a wavy subfloor.- Remove baseboards or plan for quarter round later, so the floor can float freely at the edges.
- Vacuum, scrape, and pull up anything that would keep a plank from sitting flush.
- Patch low spots and sand high spots until a straightedge shows a consistent surface.
- Add the right moisture barrier or underlayment if the product and substrate require it, especially over concrete.
- Check room temperature and storage conditions against the product instructions before you start.
- Blend planks from multiple cartons during installation so the pattern variation looks deliberate.
If the planks already have an attached pad, I do not add another layer unless the installation sheet specifically allows it. Extra underlayment can interfere with the locking system, change the floor height, or make the joints feel unstable. With floating floors, the room should be able to move as a system, not as a stack of unrelated layers.
Once the base is right, layout becomes a design decision instead of a rescue mission.

Plan the layout so the floor looks intentional
The cleanest vinyl plank floors usually feel quiet because the layout is simple. I normally run the planks along the longest uninterrupted wall or the strongest sightline from the doorway, then I check whether that direction makes the room feel balanced. In a bathroom, I care less about abstract symmetry and more about whether the floor looks calm when you stand at the door and look in.
There are three layout checks I never skip:
- Dry-lay a few boards to see where the last row will land.
- Avoid ending with a narrow sliver at the opposite wall; if that happens, shift the starting line.
- Plan around fixed items first, including toilets, tubs, vanities, and thresholds.
I also think about waste before I buy material. For a straight layout, I like to allow about 10% extra. If I am installing diagonally, I move closer to 15%. That extra stock is not wasted money; it is insurance against bad cuts, color matching, and the one board you decide to replace because the grain reads wrong in the room.
Once the layout is set, the first rows matter more than the rest of the job. If those rows drift, everything after them carries the mistake.
Lay the first rows carefully and keep the joints honest
The first three rows are where I slow down. If they are straight, the rest of the floor usually behaves. If they are off, every later cut and seam keeps reminding you. I start in a corner with the tongue facing the wall, set 1/4-inch spacers around the perimeter, and build the starter row with care so the line stays true.
- Snap a reference line if the wall is not trustworthy.
- Place the first plank with spacers against the wall to maintain the expansion gap.
- Lock the next plank according to the click system, then check that the row is still straight.
- Use a tapping block and pull bar only as the product allows, and never hit the plank edge directly.
- Stagger end joints by at least 6 inches; 8 inches is a safer target when the manufacturer allows it.
- Keep the last plank in each row long enough to stay stable, and do not force a small cut into place if it weakens the pattern.
When a joint resists, I stop and look for debris in the groove, a damaged tongue, or a slight angle problem. Forcing a lock is a classic beginner mistake because it can look fine at first and still leave a stressed seam that opens later. A good vinyl plank floor should feel like a system that fits naturally, not one that had to be bullied into shape.
From there, the remaining challenge is the stuff around the room edges, which is where many otherwise good installs go wrong.
Handle doorways, bathroom fixtures, and finishing details the right way
Door jambs are one of the easiest places to improve the finish. I undercut them so the plank slides underneath instead of butting into a visible notch, and I leave the required expansion space under that trim. It takes a little extra time, but it produces a cleaner line and avoids the awkward look of a floor cut around a casing that should have been hidden.
- Keep a 1/4-inch gap at the perimeter and around fixed penetrations unless the product says otherwise.
- For pipe cuts, leave room for movement rather than hugging the pipe tightly.
- Use silicone only where the installation guide allows it, especially around tubs, toilets, and other wet zones.
- Install permanent cabinets, vanities, or islands first when the floating system requires it, then run flooring to them.
- Attach baseboards and quarter round to the wall, not through the floor.
Bathrooms deserve extra restraint. Around a toilet flange, I follow the product instructions exactly instead of improvising, because that area combines movement, moisture, and maintenance access. Around a tub or shower base, I want the edge treatment to look deliberate and still leave the floor free to expand. If the seal is too rigid, the floor loses the very movement the floating system depends on.
After the edges are done, the last step is not more cutting. It is avoiding the mistakes that make a careful installation look rushed.
The mistakes that make a good floor look amateur
The worst vinyl plank floors are rarely the result of one catastrophic error. They usually come from several small shortcuts stacked together. These are the ones I see most often:
- Skipping subfloor leveling because the planks seem rigid enough to hide it.
- Ignoring the expansion gap and pinning the floor under trim or cabinetry.
- Starting from a crooked wall without checking the reference line.
- Using too many short offcuts, which creates a repetitive pattern and weakens the stagger.
- Failing to undercut door casings, which leaves the room looking patched instead of finished.
- Installing in a hot sunlit area without checking whether that product wants extra protection or a different method.
- Mixing boxes poorly, so the color shift reads like a mistake instead of a natural variation.
That is why I treat the finish check as part of the install, not an afterthought.
What I check before I call the room done
Before I clean up, I walk the room slowly and look for joints that sit proud, edges that flex, or trim that accidentally traps the floor. I also make sure the perimeter gap is hidden by molding rather than packed tight with caulk or fasteners, because a floating floor needs a little room to breathe.
- Every seam feels tight and flat underfoot.
- The perimeter gap exists everywhere the floor meets a wall or fixed object.
- Door swings clear the new height of the floor and trim.
- Bathroom seals are neat and only where the product allows them.
- Trim is nailed to the wall, not through the floor.
When those checks pass, the job is usually right. That is still the best way to lay vinyl plank flooring when you want a clean DIY result, a floor that can move the way it was designed to move, and a finish that still looks intentional after the room has lived through a few seasons.
