The essentials before you start clicking planks together
- Check the subfloor first. It needs to be flat, dry, and firmly fastened before any planks go down.
- Leave room for movement. A 1/4-inch expansion gap is the common target for many click-lock systems, but follow the carton if it asks for more.
- Plan for waste. I usually order about 10% extra, and closer to 15% when the room has many cuts or a tricky layout.
- Keep the first rows square. If the starter rows drift, every seam after that will show it.
- Bathroom details matter. Toilets, thresholds, and vanity bases need to be planned before the first board is locked in.
- Use the manufacturer’s climate rules. Some products still want 48 hours in the room, while newer rigid-core floors may have different requirements.
Start with a subfloor that is flat, dry, and quiet
I start every install by checking the substrate, not the planks. Click-lock vinyl can hide a little texture, but it will not forgive a hump, a soft spot, or a floor that moves underfoot. In a bathroom, I also look closely at the toilet flange, the vanity base, and any threshold so I know what will sit on top of the finished floor.
| What I check | Good target | Why it matters | What I do if it is off |
|---|---|---|---|
| Flatness | 3/16 in. over 10 ft or better, and ideally 1/8 in. over 6 ft | Stops joint stress, bouncing edges, and visible dips | Fill low spots, sand high spots, or use a leveling compound |
| Moisture | Dry and within the product’s limit | Too much moisture can lead to odor, mildew, or movement | Test the floor, fix the source, and let the room dry fully |
| Structure | No squeaks, loose panels, or deflection | A floating floor telegraphs movement | Re-fasten the subfloor before installation |
| Climate | Room kept in the maker’s install range, often around 65°F to 85°F | Helps the planks stay dimensionally stable during installation | Run HVAC and avoid cold slabs or big temperature swings |
If the product has an attached pad, I do not add extra underlayment unless the instructions explicitly allow it. I also blend boards from different boxes, because subtle shade variation is normal and looks better when it is distributed evenly. Once the substrate is right, the layout itself becomes much easier.
Lay the first rows with the right expansion gap
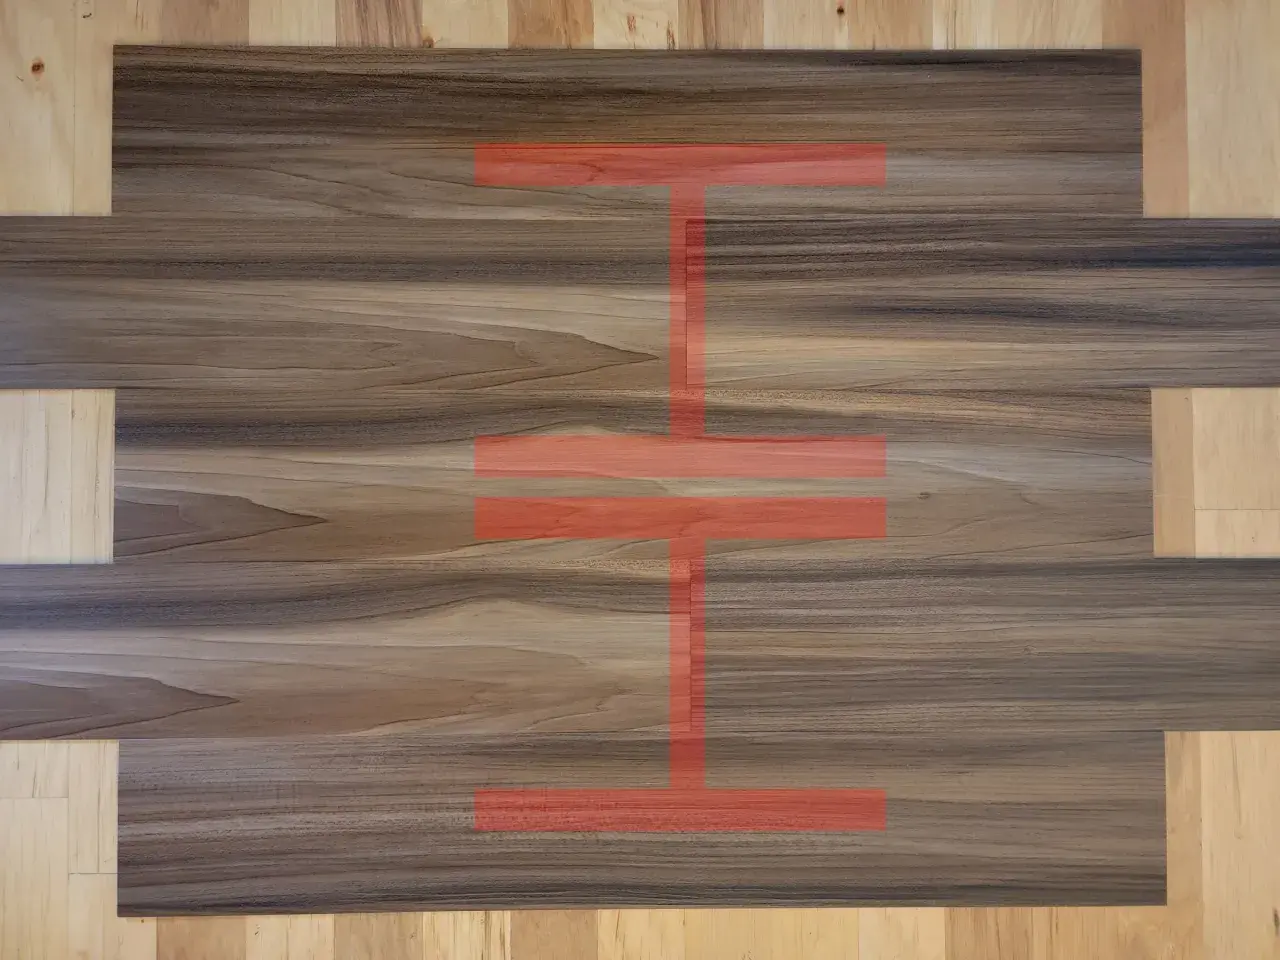
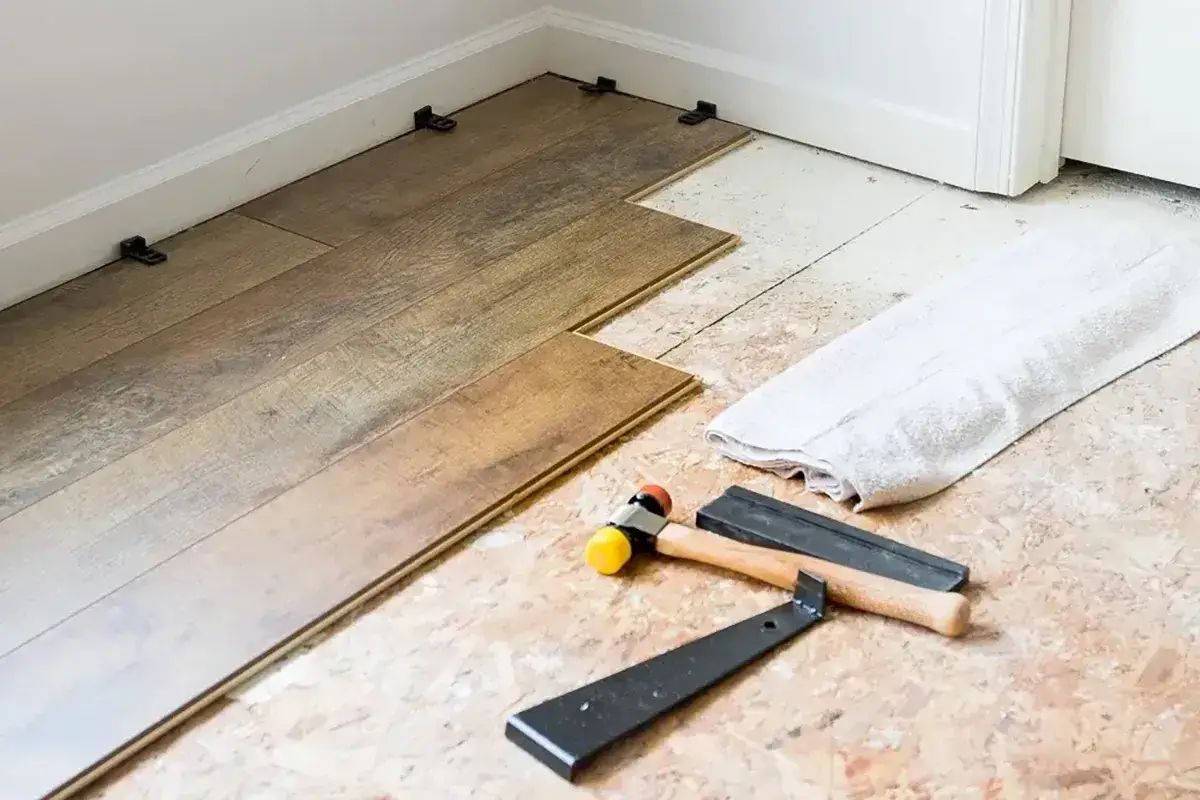
The locking system does most of the work, but the first two rows decide whether the floor feels crisp or sloppy. I always dry-fit a few planks first and check the pattern, because a mixed box install looks more natural than one that accidentally clusters similar boards together.
- Set spacers at the wall before you lock in the first board. I keep the gap at 1/4 inch unless the manufacturer asks for a different measurement.
- Start with the tongue or groove oriented the way the locking profile requires. If the starter plank needs trimming, cut it cleanly before you commit.
- Click the short ends together first, then engage the long edge so the seam closes evenly.
- Keep the first row straight. If the base line wanders, every other row will follow it.
- Stagger end joints by at least 6 inches so the floor does not develop a repetitive “ladder” look.
- Use a pull bar or tapping block only as lightly as needed and only if that product allows it. Forcing the joint is how people crack locking edges.
- Trim the last board in the row so the edge against the wall still has the same expansion space as the starter side.
When the foundation rows stay square, the hard cuts around openings become much less stressful. That same logic matters even more when you hit a doorway, a toilet flange, or another fixed object.
Cut cleanly around doorways, toilets, and awkward shapes
Bathrooms add a few awkward spots that living rooms do not, especially around toilets, vanities, and thresholds. I plan those cuts before I commit to a direction, because a beautiful field of planks can still look rushed if the pieces at the perimeter feel improvised.
Door jambs and thresholds
I undercut the casing so the plank slides beneath it and the trim hides the edge. That gives a cleaner line than trying to scribe around every bump in the door frame. The expansion gap should still exist under the trim, not be crushed tight against the wood.
Toilet openings and fixed fixtures
If possible, I remove the toilet and reset it after the floor is finished, because the cut is cleaner and the flange area is easier to work around. If I have to work around the bowl, I make a template first, cut conservatively, and leave enough room for the floor to move. Vinyl should not be trapped hard against the fixture.
For built-in vanities or other fixed cabinets, I stop the floating floor at the base unless the product instructions clearly allow it underneath. That keeps the floor free to expand and prevents the first click seam from turning into a stress point later.
Read Also: Stone Flooring Installation: The Complete Guide
Odd shapes and vent cuts
Curved tubs, floor registers, and angled corners are where cardboard templates earn their keep. I trace the shape, test the fit dry, and only then make the final cut. A careful template usually looks better than a guessed cut, and in a bathroom that visual discipline matters more than people expect.
Once the tricky cuts are handled, the remaining job is protecting the floor so it can move the way a floating floor is supposed to move.
Keep movement paths open when you finish
Once the boards are down, the floor still needs room to breathe. I remove spacers, attach baseboards and shoe molding to the wall, and use transitions at room breaks so the floating surface is not pinned in place.
- Attach trim to the wall, not the floor. The floor has to move under the molding.
- Reset the toilet with a fresh seal if you removed it, and check that the flange still sits at the proper height.
- Do not trap the planks under heavy fixed cabinetry unless the product instructions explicitly allow it.
- Use flexible sealant only where appropriate. Around tubs or wet edges, I follow the flooring instructions, not a one-size-fits-all rule.
- Keep spare boards. A few planks from the same batch make future repairs much easier.
The biggest failures people blame on the product usually come from a handful of avoidable habits, which is why I always run through them before I call the room done.
Common mistakes that make a simple job fail
Most click-lock vinyl problems are self-inflicted. They usually come from rushing the prep, forcing the joints, or forgetting that the floor needs room to move after it is installed.
- Skipping flatness checks. A floor that looks “good enough” from standing height can still have dips that stress the seams.
- Ignoring moisture. Vinyl resists water on the surface, but moisture below the floor can still cause trouble.
- Starting with a crooked row. If the first course is off, the error multiplies across the room.
- Leaving no expansion gap. Tight edges are one of the fastest ways to get buckling or edge stress.
- Not staggering end joints far enough. Short, repetitive seams make the floor look busy and can weaken the visual rhythm.
- Using too much force on the lock. The joint should click together cleanly, not be battered into place.
- Trapping the floating floor. Cabinets, heavy fixtures, and poorly placed trim can stop the floor from moving as designed.
If you avoid those mistakes, the project usually moves faster than expected and looks more polished than most DIY floors do. Before I close out a bathroom, I run one last pass for movement, alignment, and fixture clearance.
The last checks I would make before putting a bathroom back into service
A floor can be technically installed and still feel unfinished. Before I hand a bathroom back to daily use, I check three things: the expansion gap is hidden but still present, the trim is attached to the wall, and the door and toilet clear the new floor without binding.
- Run a hand along the perimeter to confirm no board is tight to the wall.
- Look for lifted edges at seams, doorways, and transitions.
- Confirm the toilet flange, threshold, and door swing still work after the new floor height is in place.
- Keep a few spare planks from the same batch for future repairs.
That is the difference between a floor that simply goes down and a floor that holds up in a moisture-prone room. If the subfloor is flat, the first rows stay square, and the movement paths remain open, the finished vinyl floor should look calm, clean, and built to last.
