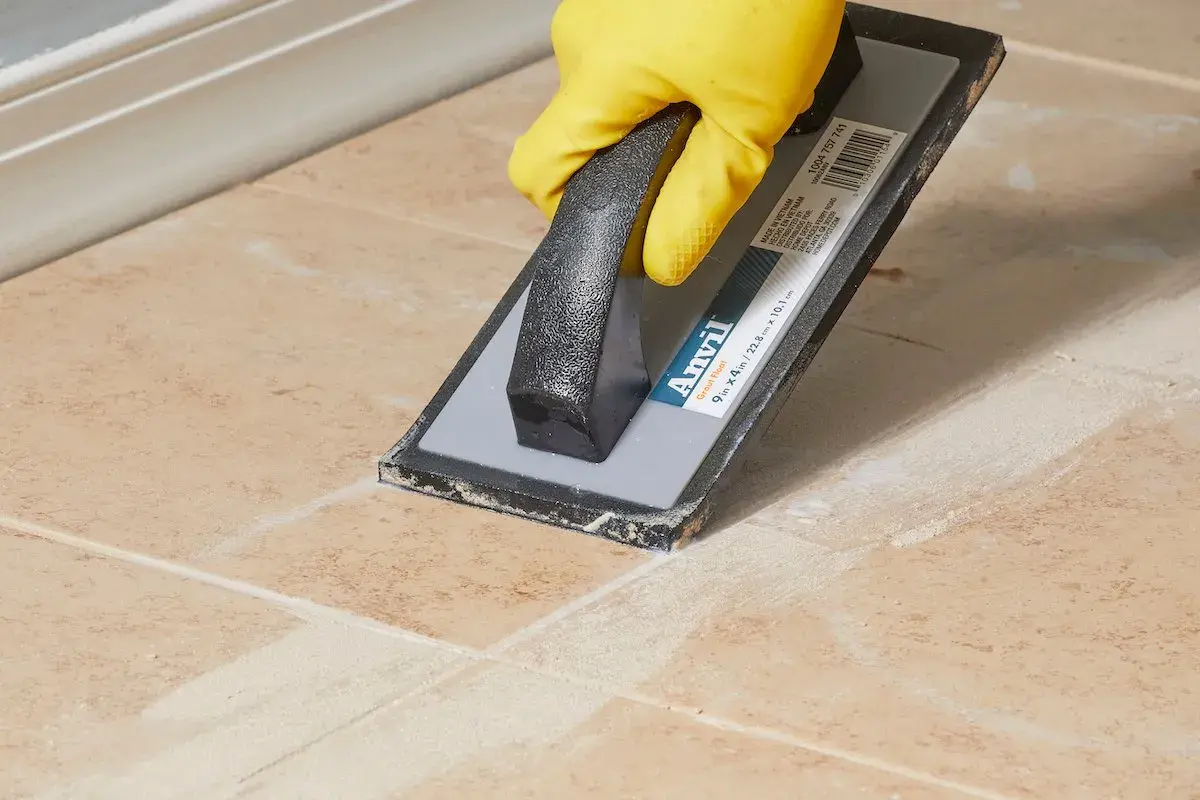
Fresh grout smears, a dull haze, and grout that has to come back out of the joint are three different problems, and each one needs a different fix. Knowing how to remove grout from tile saves time, but it also protects the finish on ceramic, porcelain, glass, and natural stone. I’m focusing on the practical steps that actually work in real bathrooms and kitchens, plus the mistakes that turn a small cleanup into a repair job.
The fastest way to clean grout off tile is to match the method to the residue
- Fresh grout smears usually come off with a damp sponge and a microfiber cloth before they harden.
- Cement haze often needs a grout haze remover or a sulfamic-acid-based cleaner on acid-resistant tile.
- Epoxy or urethane haze needs a non-cement remover, not vinegar or a standard acid cleaner.
- Grout inside the joint requires a grout saw or oscillating tool, not surface cleaning.
- Natural stone needs extra caution because acidic cleaners can etch marble, limestone, and travertine.
- Small test spots matter more than speed when you are working on a finish you want to keep.
Figure out which kind of grout residue you have
I start every cleanup by identifying the residue, because the wrong method wastes time and can damage the tile. A fresh smear on the surface is very different from cured haze, and both are different again from grout that has settled in the joint where it does not belong. The cleaner, the tool, and even the amount of pressure all change depending on which problem you are solving.
| What you see | What it usually is | Best first move | What to avoid |
|---|---|---|---|
| Soft smears or squeeze-out | Fresh grout on the tile face | Damp sponge, then microfiber cloth | Scraping hard before the grout firms up |
| Cloudy, chalky film | Cement haze | Dry buffing first, then a haze remover | Flooding the tile with water |
| Sticky or shiny residue | Epoxy or urethane film | Non-cement haze remover made for that grout type | Vinegar, muriatic acid, or guesswork |
| Material sitting in the joint | Grout that needs to be removed from the line itself | Grout saw or oscillating tool | Metal blades on fragile tile edges |
Once you know what you are dealing with, the rest of the job gets simpler and much safer. The next step is gathering the right tools so you are not reaching for the wrong one halfway through the cleanup.
Gather the right tools and protect the tile before you start
The good news is that most of the basic cleanup tools are inexpensive. A grout sponge, microfiber cloth, bucket, and plastic scraper usually cost very little, while a grout saw or oscillating multi-tool only makes sense if you need to remove hardened material from the joints. For a bathroom backsplash or shower wall, I would rather have the right low-cost hand tools than rely on force.
- Grout sponge with rounded edges
- Two buckets of clean water, or one bucket changed often
- Microfiber cloths for the final buff
- Plastic scraper for soft buildup
- White nylon scrub pad for safe surface cleaning
- Painter’s tape to protect adjacent caulk, trim, or fixtures
- Vacuum or brush for dust when cutting grout out of joints
- Grout haze remover or sulfamic-acid cleaner for cement residue
- Non-cement haze remover if the grout is epoxy, urethane, or premixed
- Respirator or mask, nitrile gloves, and eye protection when using cleaners or power tools
I also protect the surrounding finishes before I touch the tile. That means taping off metal trims, keeping acidic cleaners away from natural stone, and checking whether the tile has a polished, textured, or glazed surface. Those details matter, because the same product can be harmless on porcelain and a bad idea on marble. With the prep done, the actual cleanup is much easier.
Remove fresh grout before it hardens
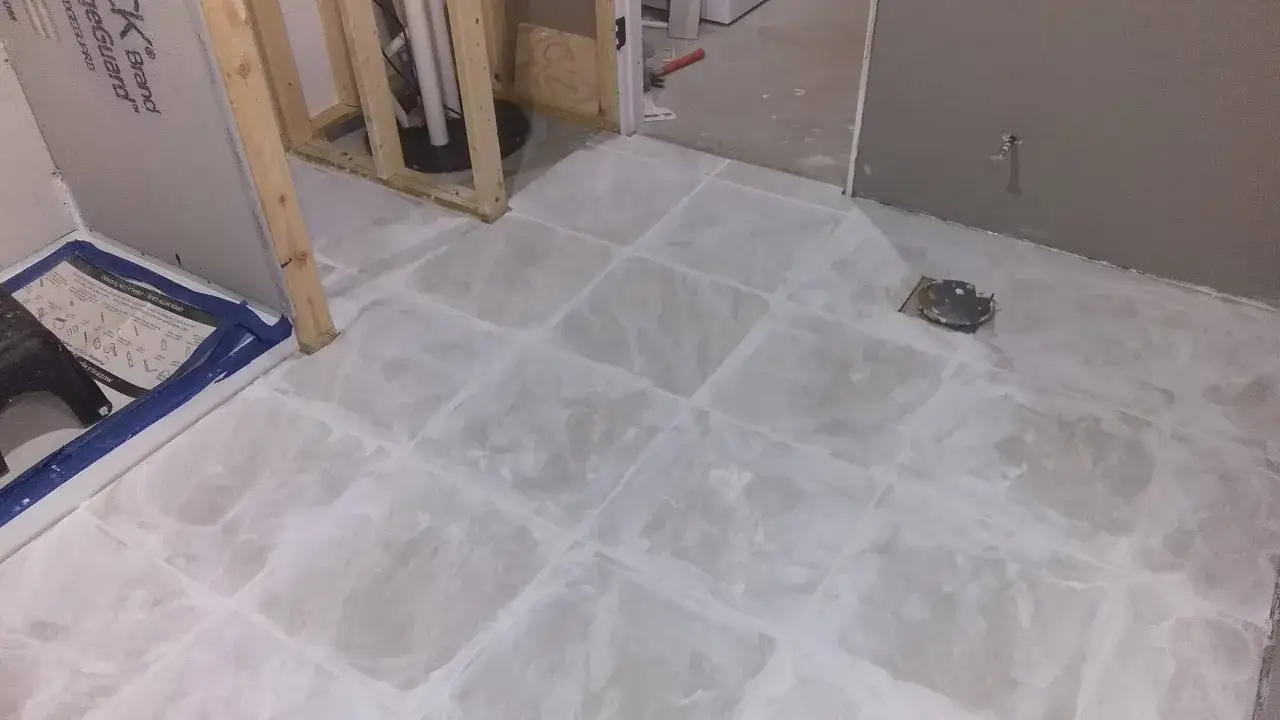
Fresh grout is the easiest version of this job, and it is the one I like to handle as soon as the grout firms up enough not to pull out of the joint. If I can wipe the tile without dragging the grout out of the seams, I know I am in the right window. Too much water is the mistake here, not too little effort.
- Let the grout firm in the joint until it no longer slumps or smears when touched lightly.
- Rinse a grout sponge, wring it out well, and wipe diagonally across the tile face so you do not dig into the joints.
- Flip the sponge often and rinse it as soon as it loads up with residue.
- Use clean water, not dirty wash water, for the final pass.
- Buff the tile with a dry microfiber cloth once the surface looks clean.
- Check the tile again after it dries, because a light film can show up only after the moisture evaporates.
If the grout is still soft enough to smear everywhere, wait a little longer instead of scrubbing harder. If it has already turned into a dull film, move to the haze-removal approach instead of trying to keep washing it with plain water. That shift in timing is where many DIY jobs go wrong, so the next section is the one that usually saves the finish.
Deal with cured haze and residue based on grout type
Once the residue has cured, the cleaning method depends on the chemistry of the grout. Cement-based haze responds differently than epoxy or urethane film, and treating them the same usually makes the problem worse. I make this distinction early because it is the difference between a quick cleanup and a scratched or dulled tile surface.
Cement-based haze
For cementitious grout haze, I usually start with a dry microfiber cloth or white nylon pad and see whether the film releases with light buffing. If it does not, a grout haze remover or a sulfamic-acid-based cleaner is often the next step on acid-resistant tile. I still test a small area first, because some glazed finishes can dull or etch if the cleaner stays on too long.
Use the product exactly as directed, work in small sections, and rinse thoroughly when you are done. Acidic cleaners are helpful, but they are not a shortcut for sloppy technique. On bathroom walls and floors, I would rather do two careful passes than one aggressive one.
Epoxy, urethane, and premixed haze
Epoxy and urethane residue is a different animal. Acid cleaners will not solve it, and vinegar will not magically fix it either. For that kind of film, I use a dedicated non-cement haze remover or the product recommended for that grout type, then scrub with a white pad or a soft brush.
This is also where tile compatibility matters most. Ceramic and porcelain are often more forgiving than natural stone, but that does not mean every finish can take the same treatment. If the tile is glassy, polished, or expensive enough that you would hate to replace it, I would stay conservative and stop at the first sign of dulling.
Read Also: New Grout Over Old - Does it Really Work?
Natural stone and polished surfaces
Marble, limestone, travertine, and other polished stone deserve a separate warning. Acid-based products can etch them, and etching is not a stain you wipe away later. If the residue is on stone, I prefer a stone-safe cleaner and a small test area, and I am far less willing to improvise.
When the haze is stubborn, the safest answer is often to slow down rather than intensify the cleaner. If the residue is actually inside the grout line, though, surface cleaners will not help, which is why the next section is about removing grout from the joint itself.
Remove grout from the joints when the line itself needs a reset
Sometimes the problem is not film on the tile face. It is grout packed too high, the wrong color, a damaged section, or a joint that needs to be reopened before regrouting. In those cases, I use a grout saw for small areas or an oscillating multi-tool with the right blade for larger runs.
- Score the grout line lightly and keep the blade centered in the joint.
- Work in short passes instead of trying to clear the whole joint at once.
- Vacuum dust often so you can see the depth you are reaching.
- Stop before the blade starts riding against the tile edge.
- Use hand tools on brittle, glazed, or delicate tile where a power tool could chip the edge.
I do not like rushing this part, because the tile edge is what pays for sloppy tool control. If you are removing grout only in a few damaged sections, hand tools are slower but usually safer. If you are redoing a long run, the oscillating tool saves a lot of time, but it still needs a steady hand.
Avoid the mistakes that scratch tile or stain stone
The most common failures are surprisingly ordinary. People scrub too early, use the wrong cleaner, or assume one product works on every grout type and every surface. Those shortcuts are exactly how a simple tile cleanup turns into a dull finish, chipped edges, or permanent staining.
- Do not use vinegar or acid on marble, limestone, travertine, or other acid-sensitive stone.
- Do not assume an acid cleaner will remove epoxy or urethane residue.
- Do not use a metal blade aggressively on glass tile or fragile edges.
- Do not flood the tile with water while the grout is still fresh in the joints.
- Do not skip a test spot, especially on textured or handmade tile.
- Do not leave cleaner sitting longer than the label allows.
- Do not forget to rinse after using any haze remover, especially on bathroom floors where residue can make the surface slick.
There is one more point I see people miss: grout haze is not always a cleaning problem. Sometimes it is a sign that the installation itself was rushed, the wrong grout was chosen, or the tile needed more protection during the install. That is why the final cleanup is as much about finishing well as it is about removing residue.
The last pass that keeps the surface looking finished
After the grout is gone, I rinse the tile with clean water, dry it completely, and inspect it under good light from more than one angle. That last inspection catches the thin haze lines and dull patches that are easy to miss when the tile is still damp. If the grout type calls for sealing, I wait for full cure before sealing the joints, because sealing too soon can trap moisture and blur the result.
For bathroom projects, I also keep the room ventilated and avoid heavy use until the surface is fully dry. If the tile still looks cloudy after the correct cleaner, the correct rinse, and a careful test spot, I stop there and bring in a tile professional rather than keep escalating the chemistry. A clean finish is worth more than an aggressive fix that damages the surface you just installed.
