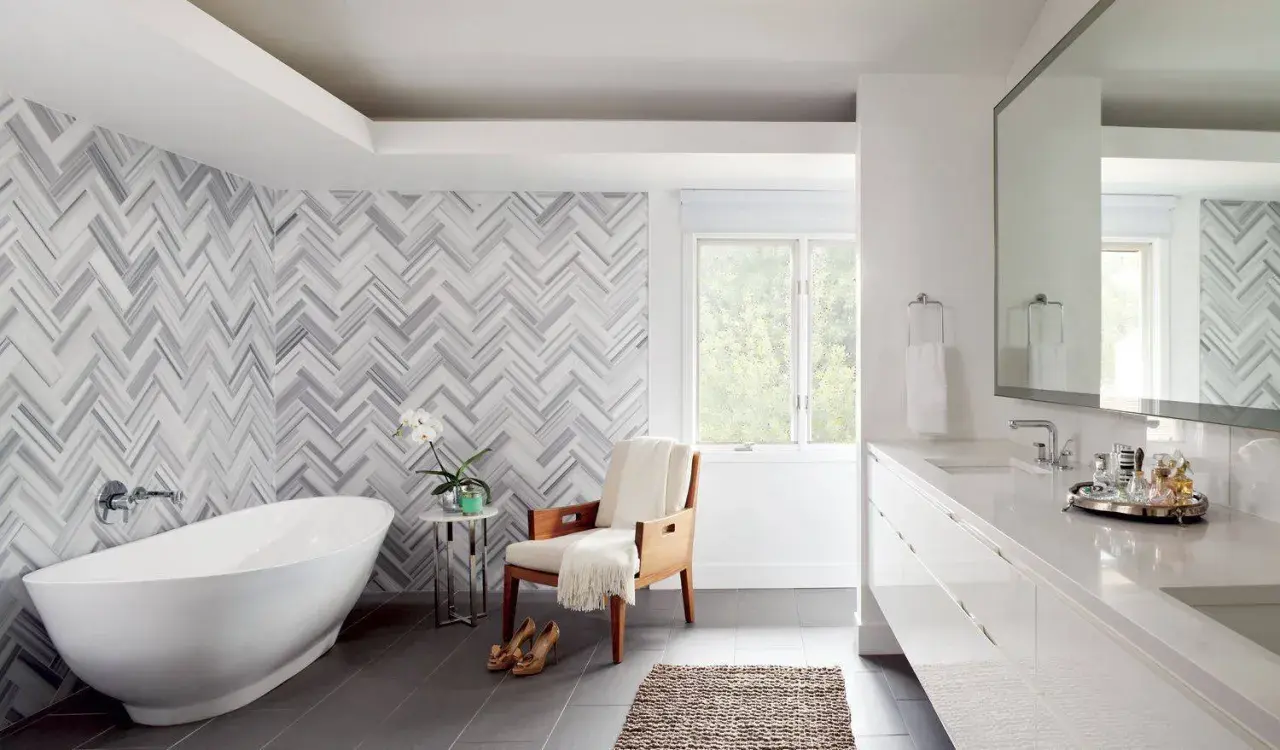
A herringbone pattern shower adds movement without needing loud color or ornate detail. The zigzag layout can make a bathroom feel more tailored, but it also changes how the tile reads, how the corners land, and how much maintenance the shower will ask for later. This article breaks down where the pattern works best, which tiles make sense, and the design choices that keep it looking sharp instead of busy.
The practical takeaways before you tile
- The pattern works best when the tile size, grout width, and drain type are chosen together.
- Wall applications are easier to execute cleanly than floor applications, especially in compact showers.
- 90-degree herringbone usually looks calmer and cuts more cleanly, while 45-degree feels more dynamic.
- Porcelain is the safest all-around choice for everyday use, while marble and glass need more care.
- Grout color changes the whole read of the shower, from subtle texture to strong graphic contrast.
- Waterproofing and slope matter more than the pattern itself, because grout is not the waterproof layer.
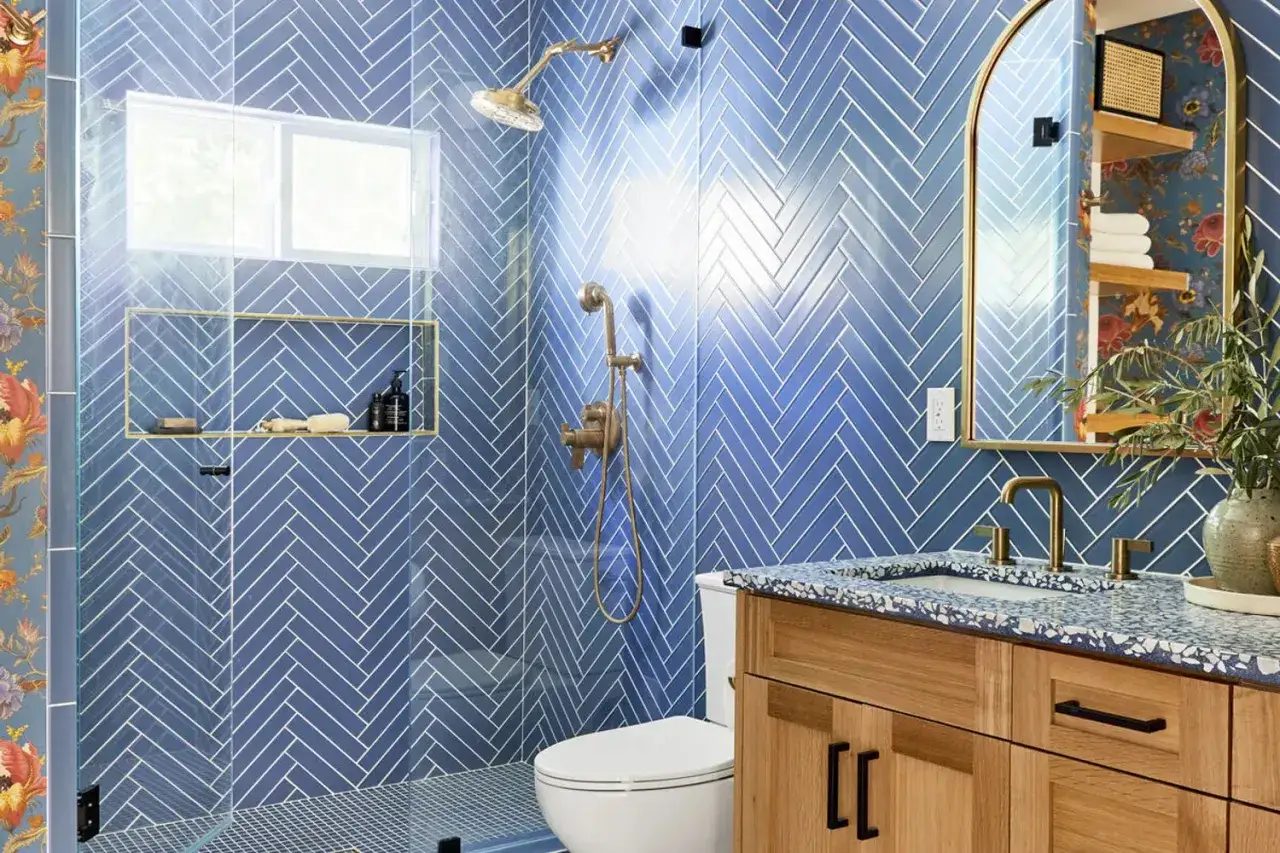
How the zigzag layout changes the room
I usually treat herringbone as a texture move first and a decorative move second. The angled joints create motion, so even a plain rectangular tile starts to feel custom, and that is why the pattern shows up so often in showers that need personality without relying on color alone.
It also changes the way the enclosure reads. In a small bath, the repeated V-shape can make the wall feel taller and more deliberate. In a larger shower, it can add rhythm to an otherwise flat surface. The visual effect depends less on the tile itself and more on how the pattern is oriented. A 90-degree layout feels orderly and architectural, while a 45-degree layout feels more energetic and slightly more dramatic.
That difference matters, because the right angle in a shower is not always the prettiest one on paper. It is the one that fits the room, the drain, and the amount of visual activity already happening elsewhere. Once that is clear, the next decision is where the pattern should actually live.
Where it works best inside the shower
The safest place to use herringbone is on the shower walls, especially the main focal wall behind the valve or showerhead. Walls give you more uninterrupted space, which lets the pattern breathe and keeps the cuts under control. If you want the shower to feel custom without overwhelming it, wall tile is where this layout earns its keep.
On the floor, the pattern is more demanding. You have to think about slope, traction, and the drain location at the same time. A point drain can force more awkward cuts, while a linear drain is more forgiving. Schluter notes that a linear drain allows the shower base to slope on a single plane, which opens up more tile options on the floor. That is one reason a herringbone floor is much easier to execute when the drainage system was planned with it in mind.
Niches and curbs can also carry the pattern, but I would use them with restraint. A herringbone niche back wall can be a smart accent because it feels intentional rather than decorative for decoration’s sake. A herringbone curb can work too, though it needs careful alignment so it does not look like an afterthought. The more surfaces you pattern, the more disciplined the rest of the shower has to be.
If you want the room to feel calm, let the wall do the talking and keep the floor simpler. That leads naturally into the question of which tile sizes and materials actually support the look.
Tile sizes, materials and grout that make the pattern work
Rectangular tile is the core requirement, but not every rectangle behaves the same way. In most showers, I find the cleanest results with tiles in the roughly 2x8 to 4x12 inch range. Smaller rectangles can make the pattern feel busy, while very long tiles can create awkward cuts and magnify any slight drift in the layout.
| Material | Best use | What it does well | What to watch |
|---|---|---|---|
| Porcelain | Walls and floors | Durable, low absorption, easy to live with | Can look flat if the color and finish are too uniform |
| Ceramic | Walls | Flexible style options and often lower cost | Not my first choice for a heavily used shower floor |
| Marble or other stone | Feature walls and upscale showers | Depth, veining and a more tailored finish | Needs sealing and more maintenance |
| Glass | Accents and niche backs | Reflects light and brightens a compact enclosure | Lippage, water spots and cleaning marks show quickly |
That means the right look is only half the decision. The other half is making sure the tile format, grout width and finish all work together in a wet space. Once those pieces are aligned, the layout itself becomes much easier to plan.
How to plan the layout so the lines land cleanly
Herringbone looks best when the eye cannot see the troubleshooting behind it. I always start by deciding where the pattern should be centered, because that choice affects everything else. In a shower, the most important center is usually not the geometric center of the wall, but the visual center, often the area behind the showerhead or the wall people notice first when they step in.
From there, I dry-fit the pattern around the niche, corners and curb before setting anything permanently. That sounds basic, but it is where many showers go sideways. If a niche interrupts the pattern at an odd angle, the whole wall can look accidental. If the cuts at the perimeter are tiny slivers, the shower feels off-balance even if the installer did everything “correctly.”
Here is the sequence I would follow on a real project:
- Choose the focal wall first, then decide whether the pattern will cover one wall or the full enclosure.
- Pick 90-degree or 45-degree herringbone based on the room size and the amount of cutting you want to accept.
- Mock up the tile around niches, benches and corners before the first full run is installed.
- Check whether the edge cuts stay visually substantial, not thin and fragmented.
- Order extra material. I usually allow about 15 percent overage for a straightforward wall and closer to 20 percent when the shower has multiple interruptions.
Styling choices that keep the shower balanced
The pattern can be the star, but it should not have to compete with everything else. The easiest way to keep the shower balanced is to let one element lead, then quiet the rest. In practice, that often means a herringbone wall with simple plumbing fixtures, or a patterned niche inside a larger shower that stays otherwise restrained.
Grout color has a bigger effect than most homeowners expect. A tone-on-tone grout keeps the surface calm and lets the shower read as one continuous plane. A darker grout sharpens each angle and makes the zigzag more obvious. I like contrast when the shower is large enough to handle it, but in a compact bath I usually lean toward a grout that is close to the tile color.
Finish matters too. Matte and honed surfaces usually feel better in showers because they keep reflections under control and hide water marks more easily. Polished tile can look elegant, especially on a wall, but it tends to make every imperfection more visible. On floors, a lower-sheen finish is usually the safer choice.
Hardware and trim should support the tile rather than fight it. Brushed nickel, chrome, warm brass or matte black can all work, but I would avoid pairing a highly patterned shower with overly ornate fixtures. A simple profile edge, a clean slab curb top, or a restrained niche shelf will usually age better than decorative add-ons. When the styling is disciplined, the pattern feels intentional instead of crowded.
Mistakes that make the pattern feel busy
The most common mistake is assuming the pattern itself will fix a weak shower design. It will not. If the waterproofing is poor, the slope is wrong, or the tile size is off, herringbone just makes the problems more visible. Because the joints are so active, any inconsistency in spacing or alignment shows up quickly.
Another mistake is using the wrong scale. Too small, and the wall becomes visual noise. Too large, and the zigzag loses its character. A shower with strong veining, a dramatic accent wall and a busy herringbone floor can also become too much at once. I usually want only one strong pattern at a time.
There is also a maintenance tradeoff. More grout lines mean more cleaning than a straight-set layout, especially on the floor. That does not make the pattern impractical, but it does mean you should be honest about how much upkeep you want. If low maintenance is the priority, keep the pattern on the wall and let the floor stay simpler.
Finally, do not ignore edges and transitions. Herringbone that dies awkwardly into a corner, a niche or a curb edge can look unfinished even when the tile is high quality. Clean terminations are part of the design, not an afterthought. Once those risks are under control, the pattern becomes much easier to enjoy.
What I would choose for a shower that ages well
For most homes, I would choose porcelain in a 2x8, 3x12 or similar rectangular format, use a grout joint that suits the tile calibration, and keep the grout close in color to the tile. That combination gives you the movement of the pattern without turning the shower into a maintenance project. If the room is small, I would lean toward 90-degree herringbone on the wall and keep the floor quieter.
If the shower has a linear drain, I would consider carrying the pattern farther, because the drainage system gives you more freedom with larger tile on the floor. If it has a standard point drain, I would be more conservative and let the walls carry the look. That is not a limitation, just a smarter use of the pattern’s strengths.
The best version of this design is not the most complicated one. It is the one where the angle, scale, grout and waterproofing all make sense together, so the shower feels tailored every day instead of just impressive on installation day. If you keep that standard in mind, the result will still look current long after the trend cycle moves on.
