What matters most before the first tile goes up
- The shower has to be waterproof as a system, not protected by grout alone.
- Porcelain is the safest all-around choice, while small mosaics are usually the easiest floor option.
- Flat, rigid substrate and correct slope matter more than decorative tile details.
- Most DIY failures come from layout shortcuts, skipped flood tests, and weak movement joints.
- Budget for waterproofing, trim, and tools as seriously as you budget for tile.
Start with the shower system, not the tile
The first decision is not color or pattern. It is whether you are building a bonded waterproof assembly, a traditional pan-and-wall shower, or a foam-panel system designed to simplify the job. The Tile Council of North America is explicit that grout joints are not waterproof; the waterproofing layer and the substrate are what keep the structure dry. That is why I think about the drain, pan, curb, corners, and wall build as one connected system.
- Flatness keeps wall tile from looking wavy and reduces lippage.
- Slope moves water to the drain instead of letting it collect on the floor.
- Rigidity prevents movement that can crack tile and grout.
- Compatibility matters because the membrane, mortar, drain, and backer board have to work together.
If the structure is wrong, no finish tile can rescue it. Once the shower shell is right, the rest of the project becomes much more predictable.
Choose tile and setting materials that fit the wet zone
I separate shower materials by job rather than by style. What looks elegant on a sample board may be awkward on a floor slope or around a niche, and some materials are simply more forgiving for a first-time installer. For most builds, porcelain gives the best balance of durability and low absorption, ceramic is fine on walls, and natural stone only makes sense if the owner is ready for more maintenance.
| Material | Best use | Why it works | Watch-outs |
|---|---|---|---|
| Porcelain | Walls and floors | Dense, durable, and low absorption | Can be harder to cut cleanly; some large-format pieces need extra support |
| Ceramic | Walls, especially standard surrounds | Affordable and easy to source | Usually less forgiving on floors and high-wear areas |
| Small mosaic tile | Shower floors, niches, and slopes | More grout lines help with traction and follow the slope better | More grout to clean and more time to set |
| Natural stone | Feature walls or premium builds | Rich look and tactile variation | Needs more maintenance, careful sealing, and better stain control |
I also pay attention to the mortar and membrane with the same care I give the tile. Some shower systems specify a particular mortar type, so I follow the system instructions instead of assuming any thin-set will do. Joint width matters too: around 1/16 to 1/8 inch is common on many wall tiles, while larger or more irregular tile usually needs wider joints to look straight and to absorb the tile’s actual size variation.
Once the material choice is settled, the next question is where every cut will land, because a good layout can make an average tile look sharp while a poor layout can make a premium tile look sloppy.
Plan the layout before you mix mortar
I never start setting tile until I know where the cuts will fall. In a shower, the eye goes straight to the centerline, the valve wall, the niche, and the transition at the curb or floor, so those areas deserve the cleanest layout. A dry layout also shows whether the pattern will end in awkward slivers near the ceiling or in the corners, which is a problem I would rather solve on paper than with a wet saw late at night.
- Keep cut tiles as balanced as possible on opposite sides of the shower.
- Avoid slivers smaller than about 2 inches at visible edges whenever you can.
- Center feature bands, niches, and valves so they feel intentional, not crowded.
- Mark horizontal reference lines and use a ledger board so the first wall course stays level.
- Check the floor slope before finalizing wall tile heights, especially in curbless showers or around long drains.
This is also where I decide whether the pattern actually suits the room. A stacked grid feels calm and modern, while a brick bond hides small alignment flaws better on imperfect walls. On a first DIY job, that tradeoff matters more than the trend list.
Install in the right order
Good shower installs follow a sequence. When people improvise the order, they usually trap errors behind the tile, which is the expensive way to learn.
- Inspect framing, plumbing, and substrate before a single tile comes out of the box.
- Build or confirm the shower pan and make sure the floor falls about 1/4 inch per foot toward the drain.
- Install the chosen waterproofing system on walls, curb, corners, and penetrations.
- Flood-test the pan for about 24 hours unless the manufacturer specifies a different test.
- Set wall tile, then floor tile, or follow the sequence required by your system and drain style.
- Leave movement joints at changes of plane and around the perimeter instead of forcing grout into every seam.
- Grout only after the mortar has cured enough to avoid pulling tile out of alignment.
If you are working with a bonded waterproof membrane, I would be especially careful around the drain, niche, and curb. Those are the places where sloppy cuts, unfilled voids, or skipped sealant show up later as leaks or staining. The best-looking shower in the world is still a failure if water gets behind the wall.
I also would not rely on regular drywall unless the shower method you chose explicitly allows it as part of a tested assembly. Use only the backing approved by the system you actually bought, because wet-area shortcuts are where DIY projects drift away from both performance and warranty support.
Grout, caulk, and seal the right way
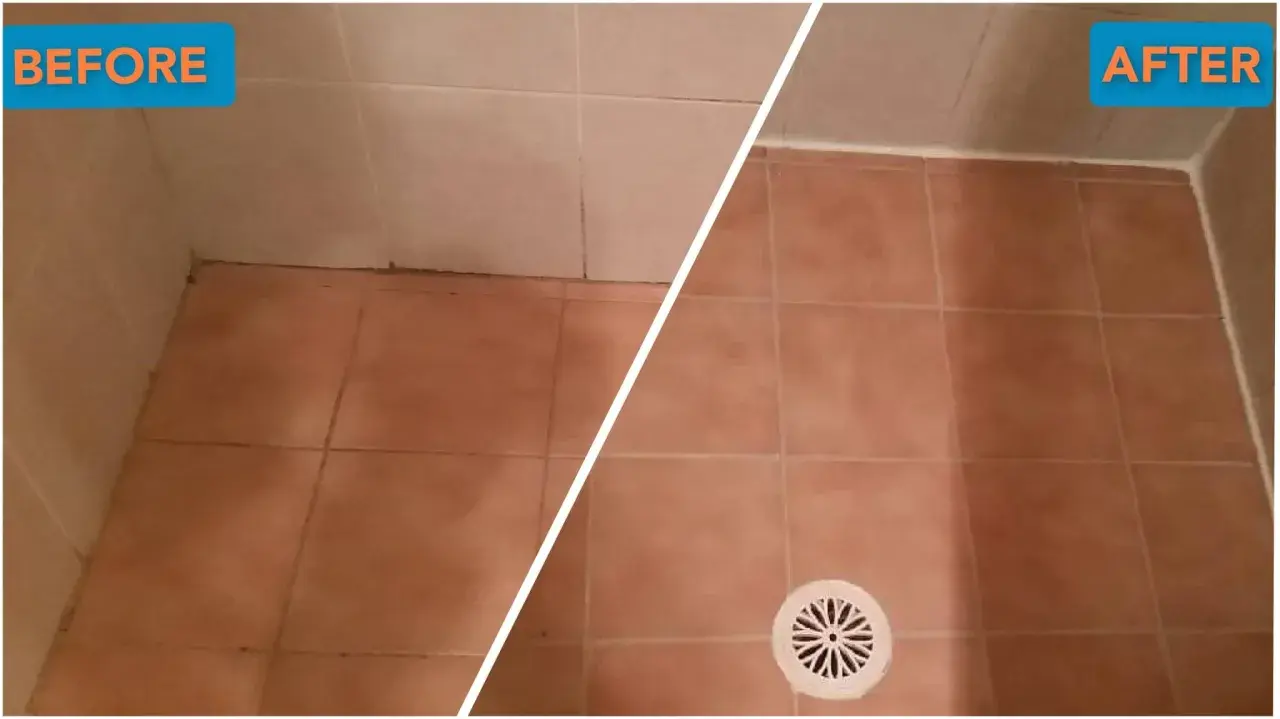
Grout finishes the look, but it does not make the shower watertight. TCNA is clear on this point: the waterproofing comes from the assembly, not the grout joints. That is why I use grout in the field and flexible sealant at corners, wall-to-floor transitions, the curb, and around fixtures where movement is predictable.
- Use 100 percent silicone or a manufacturer-matched sealant at changes of plane.
- Seal cementitious grout only if the grout manufacturer recommends it; do not expect sealer to stop water intrusion.
- Natural stone usually needs sealing, but sealing stone is still not the same as waterproofing the shower.
- Clean haze with the least amount of water that gets the job done, especially on fresh grout.
If you are using premixed grout, epoxy, or a high-performance cement grout, read the cure and cleanup directions carefully. These products save time only when you respect the timing; rushing the wash stage or soaking the joints can leave a shower looking tired before the first use.
The mistakes that create the expensive repairs
Most shower failures do not come from exotic materials. They come from a handful of predictable mistakes that beginners underestimate.
- Skipping the flood test means discovering a leak after the wall is finished.
- Ignoring slope leaves standing water that stains grout and stresses the assembly.
- Leaving no movement joints pushes stress into the tile instead of letting the assembly move naturally.
- Using oversized tile on the shower floor makes it harder to follow the slope and increases slip risk.
- Mixing incompatible products can break adhesion, especially around membranes and drains.
- Overcutting around valves and niches creates weak spots that are hard to hide and harder to waterproof.
- Setting on an unrigid substrate invites cracks even when the tile work itself looks perfect.
When I review a DIY shower, I am usually looking for one of those problems before I look at the decorative choices. That is not because style does not matter; it is because style is cheap to correct compared with a failed wall system.
What a DIY shower tile project really costs in the U.S.
For a standard 3-by-5-foot shower, I would budget in layers. The tile itself is only part of the bill; waterproofing, backer, trim, mortar, grout, sealant, and tool rental or purchase often push the total much higher than beginners expect.
| Project part | Typical DIY cost | What drives the number |
|---|---|---|
| Basic wall and floor materials | $900-$2,000 | Ceramic versus porcelain, tile size, and whether you use a simpler membrane system |
| Midrange shower build | $1,800-$3,500 | Better porcelain, matching trim, niche components, and upgraded waterproofing |
| Premium build | $3,500-$7,500+ | Natural stone, large-format tile, specialty drains, or more complex layouts |
| Tools and consumables | $150-$600 | Wet saw rental or purchase, trowels, spacers, leveling aids, buckets, mixing paddle, and blades |
Time is the other part of the budget. A first-timer usually needs 2 to 4 weekends, or roughly 40 to 80 hands-on hours, if the shower is already stripped to the framing and the plumbing is not being moved. Add more time for demolition, rot repair, niche framing, or a new curb. I would rather see a slower install with good prep than a fast one with hidden leaks.
If the project includes a steam shower, a curbless floor, or large-format stone, I would treat it as a higher-risk build and be more willing to bring in a specialist for the waterproofing phase. Those versions are much less forgiving than a standard tiled shower.
The details I would not skip on a first shower build
When I want a shower to feel finished instead of merely tiled, I focus on the small choices that hold up over time.
- Leave a small perimeter gap so the assembly can move without cracking the edge.
- Use matching trim or a clean edge profile instead of forcing raw tile edges to do the job.
- Ventilate the bathroom well so the shower dries quickly after use.
- Keep one or two spare boxes of tile for future repairs.
- Save product labels and lot numbers until the shower is fully complete.
- Inspect the niche, bench, and curb after grouting, because those details are where rushed work shows first.
If I had to reduce the whole project to one priority order, it would be this: waterproofing first, slope second, layout third, finish work last. That sequence keeps the project grounded in performance, which is the difference between a shower that looks good for a month and one that still feels solid years later.
