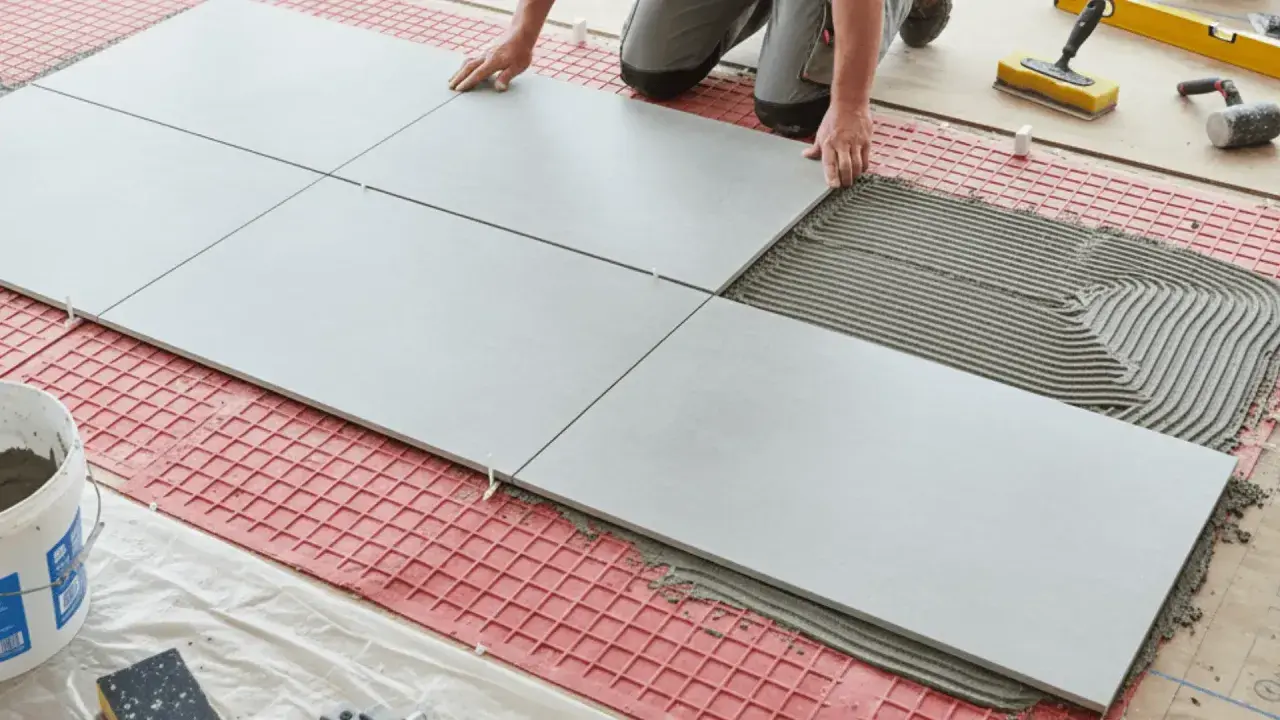
Kitchen flooring has to do more than look clean on day one. It needs to survive spills, dropped pans, chair legs, and constant cleaning without cracking or feeling awkward underfoot. In practice, the success of a tile floor depends less on the tile itself than on the base beneath it, the layout, and the finishing details.
What matters most before the first tile goes down
- Porcelain is usually the safest all-around choice for a busy kitchen, while ceramic can make sense when budget matters more.
- A flat, stiff subfloor matters more than a fancy pattern or a premium grout color.
- Dry-fitting the layout first helps you avoid awkward slivers at the walls, island, or doorway.
- Grout, movement joints, and sealing determine how clean the floor still looks after daily use.
- In 2026, professional tile installation in the US often starts around $16.38 to $20.21 per square foot, with prep-heavy jobs costing more.
Choose a tile that fits the way your kitchen is used
I usually start with performance, not style. A kitchen floor sees water, food, grit, and constant foot traffic, so the tile needs to be tough enough for real life and not just pretty in a showroom.
| Tile type | Why it works in a kitchen | Main trade-off | Typical material-only price |
|---|---|---|---|
| Porcelain | Dense, durable, low-absorption, and well suited to high-traffic spaces | Harder to cut and often less forgiving during installation | $2-$15 per sq. ft. |
| Ceramic | Versatile, attractive, and often easier on the budget | Slightly softer and less premium in performance than porcelain | $4-$15 per sq. ft. |
| Natural stone | Rich, distinctive look with a lot of visual character | More maintenance, more variation, and usually more sealing | $5-$45 per sq. ft. |
For most kitchens, porcelain is the default I would trust first. If the space gets frequent spills or has an open path to a patio or mudroom, I also look closely at slip resistance. A wet DCOF rating at or above 0.42 is a sensible filter for level interior floors that may be walked on when damp, but I still treat that number as a starting point rather than a magic guarantee.
The surface finish matters too. Matte, lightly textured, or honed looks usually feel more practical than glossy tile on a kitchen floor, especially if you cook often or have kids running through the room. Once the tile is chosen, the floor underneath becomes the real deciding factor.
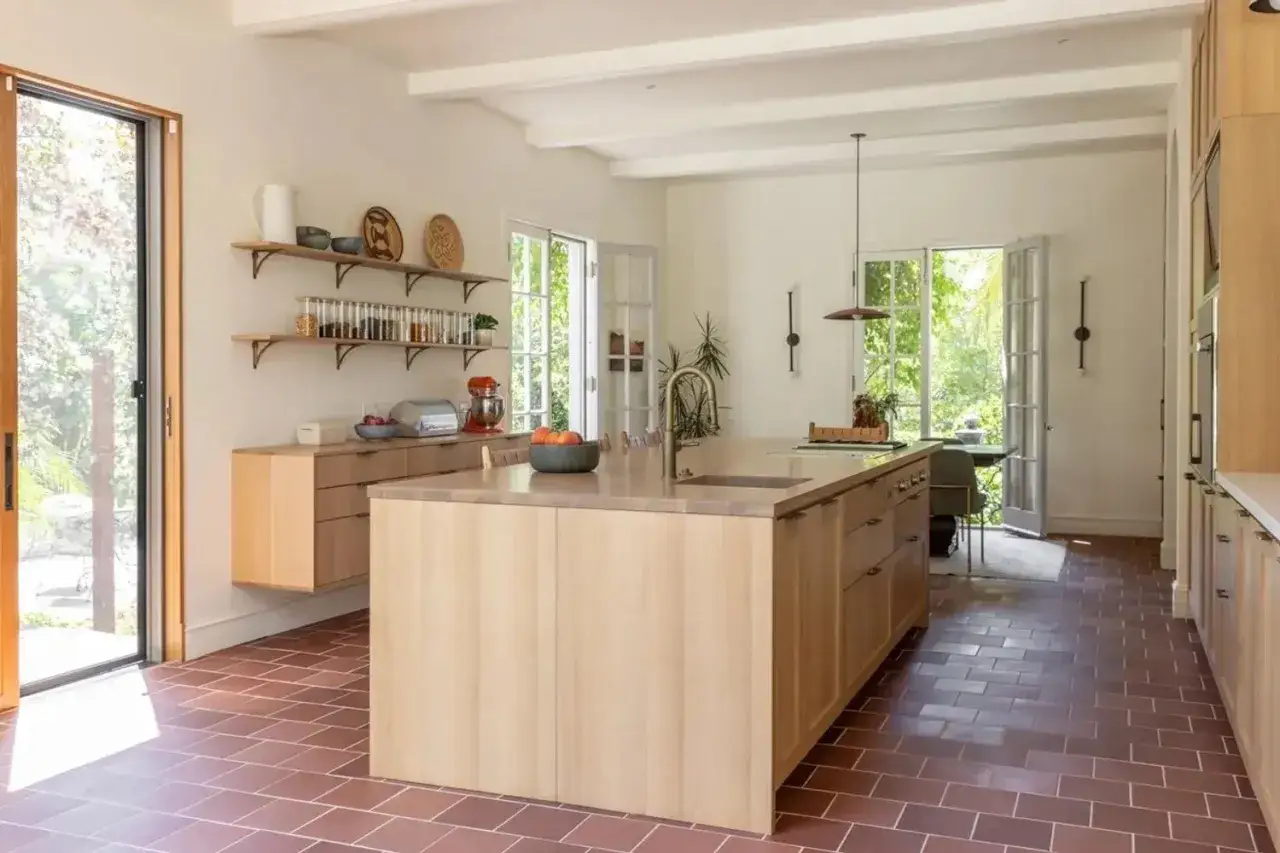
Get the subfloor right before you think about mortar
This is the part that saves the floor years later. Tile does not forgive movement, dips, or flex. If the structure below it is weak or uneven, the grout usually complains first and the tile follows.
For a standard tile floor, I want the surface flat within about 1/4 inch in 10 feet. For large-format tile, the target is tighter, often closer to 1/8 inch in 10 feet. That difference matters more than most homeowners expect, because bigger tile telegraphs flaws in the floor far more aggressively.
- On wood subfloors, check for squeaks, loose panels, and any bounce underfoot.
- On concrete slabs, look for cracks, moisture issues, and high spots that will telegraph through the tile.
- Use patching, leveling compound, backer board, or an uncoupling membrane where the floor actually needs it.
- Do not rely on thin-set mortar to fix an uneven floor; mortar bonds tile, it does not flatten a bad substrate.
If a kitchen floor has old damage or hidden flex, I would rather spend the time fixing that now than spend money later replacing cracked grout lines. Once the base is sound, layout planning stops being guesswork and starts being about visual balance.
Plan the layout so the room feels designed, not patched together
I dry-lay tile before mixing anything. That gives me a clear picture of where cuts will land, how the floor lines up with cabinets and islands, and whether the room will end up looking centered or accidental.
The most visible sightline should usually guide the starting point. In many kitchens, that means the line of sight from the entry or the main opening into the room. I also try to avoid ending with tiny slivers of tile at a wall, because those cuts make an otherwise good floor look improvised.
- Straight lay is the simplest and most forgiving pattern.
- Diagonal layout can make a narrow kitchen feel wider, but it increases cuts and waste.
- Herringbone has real visual impact, but it demands more labor and a more careful subfloor.
- Long rectangular tile often looks best with a one-third offset rather than a half-offset, especially if the tile has noticeable warpage.
- Transitions at doorways and between flooring types should be planned before the first row is set.
I think of layout as the part of the project where the room either looks intentional or merely covered. Once the layout is locked, the install itself is mostly about discipline.
Install the floor with a rhythm you can keep all day
The setting stage rewards patience. I prefer to work in small sections so the mortar stays fresh, the tile stays aligned, and I can correct problems before they spread across the room.
- Snap reference lines and confirm the room is square enough for the planned layout.
- Mix mortar exactly to the manufacturer’s ratio, not by eye, because over-watering weakens the bond.
- Spread mortar in manageable areas and comb it consistently with the right trowel notch.
- Set the tile with firm pressure, then lift a piece now and then to check coverage.
- Back-butter larger or heavily textured tile so you get better contact and fewer voids.
- Keep joints even and check lippage as you go instead of trying to fix it later.
- Protect the floor from traffic and cabinet work until the mortar has cured.
For kitchen floors, I like to see strong mortar coverage rather than just enough to hold the tile in place. A common benchmark is around 80% coverage in dry areas and closer to 95% coverage in more demanding conditions or with large-format tile. Leveling clips can help with alignment, but they are not a substitute for a flat floor or careful setting.
If you rush the setting stage, every shortcut shows up later as lippage, hollow sounds, or grout lines that do not stay consistent. After the tile is in place, the finish work becomes the part that decides how the floor ages.
Grout, movement joints, and sealing decide how the floor ages
Grout is not decoration. It is the part that gives the floor some tolerance for movement, cleaning, and the daily mess that a kitchen creates. I pay as much attention to the joints as I do to the tile face.
For most kitchen floors, cement grout is the familiar choice because it is manageable and widely available, while epoxy grout offers stronger stain resistance but is less forgiving to install. Either way, the perimeter and change-of-plane joints matter more than many people realize. Those areas need movement accommodation, not rigid grout packed into every gap.
- Keep a perimeter gap at walls, cabinets, and other fixed edges.
- Use flexible sealant at changes of plane instead of hard grout.
- Choose a grout color that hides everyday dirt without making the floor look overly busy.
- Let cement grout cure before sealing it, if the product calls for sealing.
- Clean grout haze early, because dried haze is much harder to remove later.
As a practical rule, cement-based grout usually needs about 24 hours before light foot traffic and roughly 72 hours to reach full strength. Epoxy grout sets faster, but I still follow the product data sheet rather than guessing by the clock. Once the joints are treated correctly, the next question is how much the project will actually cost.
Know the cost and timeline before you commit
In 2026, the national average cost to install a tile floor starts around $16.38 to $20.21 per square foot. That means a 120-square-foot kitchen can land roughly between $1,967 and $2,427 before local variation changes the math. Simpler jobs can come in lower, but prep-heavy projects climb quickly.
| Cost driver | What it changes | Why it matters |
|---|---|---|
| Tile material | Porcelain, ceramic, or stone | Higher-end materials raise the material bill and sometimes the labor bill |
| Surface prep | Leveling, patching, backer board, membrane, moisture work | Often the biggest swing in the final price |
| Removal work | Old flooring demo and haul-away | Adds labor and disposal costs before any new tile is installed |
| Layout complexity | Diagonal, herringbone, narrow cuts, island details | Increases labor time and tile waste |
For materials alone, glazed ceramic often runs around $4-$15 per square foot, porcelain around $2-$15, and natural stone around $5-$45, depending on grade and finish. In plain English, a clean rectangular kitchen with sound prep can be very manageable, while a kitchen that needs leveling and an intricate pattern can feel like a different job entirely.
Timing follows the same pattern. A straightforward kitchen may take only a few working days once prep, setting, grouting, and curing are counted, but I would never promise a same-weekend finish if the subfloor is questionable or the pattern is complex. If the budget and calendar still make sense, the last choice is whether the project is truly DIY-friendly.
Decide what is DIY-friendly and what is not
I am comfortable saying this plainly: tile is one of those trades where a small mistake can cost time twice. If the room is simple, the floor is flat, and the tile is standard size, a careful homeowner can do a credible job. Once the conditions get harder, the risk rises fast.
- Good DIY candidate: a small rectangular kitchen with a stable floor, simple layout, and standard porcelain or ceramic tile.
- Borderline DIY candidate: a room with a diagonal pattern, larger tile, or several transitions that need careful trimming.
- Pro job in my view: cracked slabs, major leveling needs, long plank tile, herringbone layouts, or kitchens with a lot of visible sightlines.
If you are new to tiling, the most realistic way to save money is not to force the whole job yourself. It is to handle demolition, cleanup, or material staging and then bring in help for the parts that require precision. That is usually where the best balance between cost and quality shows up.
The small habits that keep a kitchen tile floor looking new
After the last tile is set, I still think about the next five years. The best-looking kitchen floors are usually the ones that were planned with a little excess care and then maintained with equal restraint.
- Keep one unopened box of tile from the same dye lot for future repairs.
- Save the grout color, brand, and product data so touch-ups match later.
- Use felt pads on furniture and glides on stools to reduce scratches and edge wear.
- Clean with a pH-neutral cleaner instead of harsh abrasives that can dull the finish.
- Watch the first season of use closely, because that is when small movement issues usually show up.
That is the real shape of a successful kitchen tile floor: a stable base, a tile chosen for traffic and slip resistance, a layout that respects the room, and finishing details that are treated as part of the system rather than afterthoughts. When those pieces line up, the floor feels solid on day one and still makes sense years later.
