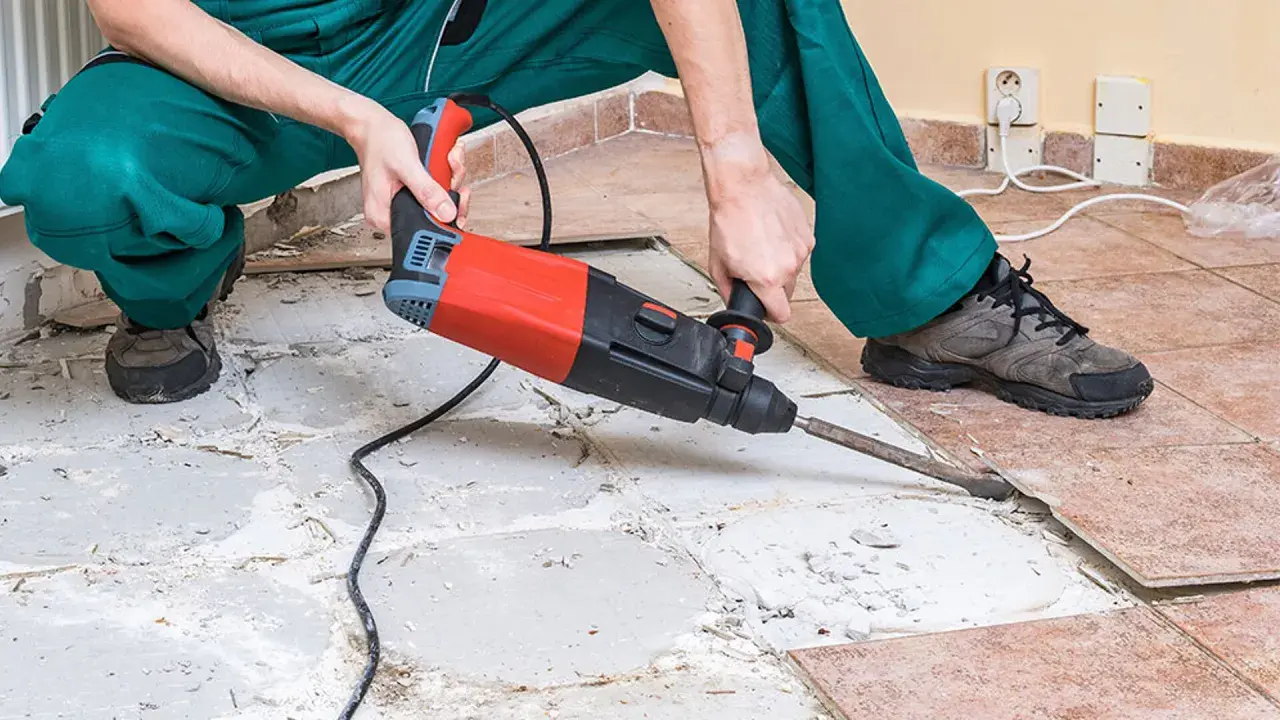
Removing ceramic tile is less about brute force than about control: the layer under the tile, the amount of mortar, and the cleanup plan matter more than the first swing of a hammer. This guide on how to remove ceramic tile flooring walks through the tools, the safest way to start, how to protect the subfloor, and what to do when the adhesive refuses to budge. I focus on the practical parts that save time and reduce damage, especially in bathrooms and kitchens where hidden layers can change the job fast.
What you need to know before the first tile comes up
- Start by identifying what sits under the tile; concrete, wood, backer board, and mortar beds behave very differently.
- Use grout-cutting tools and protective gear first; most tile damage and dust comes from rushing the opening move.
- Expect thinset cleanup to take nearly as long as lifting the tile itself.
- For small bathrooms, hand tools can work; for large rooms or stubborn floors, a rotary hammer or pro removal may save time.
- If the floor is old enough to hide suspect vinyl or mastic, stop and test before you keep chipping.
Read the floor before you start
I start with the substrate because it tells me whether I can work methodically or whether I need to be extremely conservative. Tile over a concrete slab usually behaves differently from tile over wood, and a bathroom with cement backer board or a mortar bed can change the whole pace of the job.
| What you find under the tile | What it means | Best approach |
|---|---|---|
| Concrete slab | Tiles may come up cleanly, but thinset is often stubborn | Pry and scrape; use a grinder only for high spots or tough residue |
| Wood subfloor | More risk of gouges, punctures, and loose fasteners | Work at a shallow angle and keep tools from digging in |
| Cement backer board | Tile may release with sections of board attached | Remove damaged sections together instead of trying to save weakened board |
| Mortar bed | Heavy, dusty, and slow to remove | Use stronger demo tools or consider hiring the removal out |
If I see a cracked doorway tile, loose grout, or a spot that already sounds hollow, that is usually the best place to begin. I also stop immediately if I uncover radiant heat, an unstable subfloor, or a suspicious older layer, because the wrong swing can turn a demolition into a repair project. Once you know what you are standing on, the right tools make the rest of the job much more manageable.
Tools and protection that make the job manageable
You do not need every demolition tool in the aisle, but you do need the right combination of cutting, prying, scraping, and dust control. For a typical bathroom, I like to keep the setup simple: break the first opening, pry in shallow passes, and vacuum often so I can see what the tile is actually doing.
- Grout saw or oscillating tool: cuts the grout so adjacent tiles do not chip as easily.
- Hammer and cold chisel: opens the first tile and lifts fragments.
- Pry bar and floor scraper: helps lift pieces and shave adhesive.
- Rotary hammer or small demo hammer: speeds up large rooms or stubborn floors.
- Shop vacuum, plastic sheeting, and painter’s tape: reduce dust spread.
- Safety glasses, gloves, knee pads, hearing protection, and a dust-rated respirator: the minimum I would wear in a real removal job.
If the room is big or the tiles are set hard, renting a rotary hammer with a tile chisel usually beats trying to muscle through the floor by hand. That choice also matters for fatigue: the cleanest work comes from a controlled rhythm, not from hitting harder. With the room protected and the tools ready, the actual removal process becomes straightforward, even if it is not fast.
How to remove ceramic tile flooring without wrecking the subfloor
The cleanest approach is to create a small starting point, then let leverage and gravity do the heavy work. I usually begin at a damaged tile, a doorway edge, or a spot where grout already failed, because that gives me a controlled place to break through instead of attacking a perfect tile in the center of the room.
- Clear the room, remove baseboards or thresholds if they would get in the way, and cover nearby surfaces.
- Cut or grind the grout around your starting tile so the break does not spread into neighboring pieces.
- Strike the tile with a hammer and chisel to crack it into smaller sections. A full tile is harder to move than broken pieces.
- Slide the chisel or pry bar under the fragments at a low angle and lift slowly. If the tool is diving into the subfloor, reset the angle instead of forcing it.
- Work outward in small zones, not random spots across the room. The floor stays more predictable when you finish one patch before starting the next.
- Vacuum often and remove loose shards as you go. Clean visibility matters more than people think, especially near cabinet toe-kicks and door jambs.
For larger spaces, I prefer to switch to a rotary hammer with a wide tile chisel once the first opening is made. That keeps the work moving, but it still needs restraint; aggressive pounding is the fastest way to gouge wood or punch through underlayment. When the tile is unusually stubborn, the job may also require a second pass just to strip the last thinset ridges. That thinset layer is where the job often slows down, so the next step is deciding how much of it really needs to come off.
What to do with thinset, mortar, and backer board
Thinset is the cement-based adhesive under most ceramic floors, and it is usually the part that makes teardown feel endless. On concrete, I am less worried about leaving a faint film than about leaving tall ridges; on wood, I care more about avoiding gouges and loose fibers because the next floor depends on a flat, sound base.
| What you find | What I do | Why it matters |
|---|---|---|
| Thinset residue on concrete | Scrape high ridges and remove anything that prevents a flat surface | New flooring needs flatness more than perfection |
| Cement backer board lifting with the tile | Remove it in sections and replace it | Damaged backer board does not make a reliable tile base |
| Thick mortar bed | Expect heavy demo or consider hiring it out | Mortar beds are slower, dustier, and harder on the subfloor |
| Wood subfloor gouged during removal | Patch, screw down, or replace before new flooring | Loose or damaged wood telegraphs through the next floor |
If the project is headed toward new tile, the floor must be flat and sound before anything goes down again. If it is headed toward a floating floor such as luxury vinyl plank (LVP), a few bonded patches may be acceptable as long as they stay flat and sound. I usually reserve grinders for the final stubborn spots because the dust is not worth creating unless there is no simpler option. The biggest delays usually come from bad assumptions, not from the demolition itself, which is why the next section is worth reading before you start swinging.
Common mistakes that turn a demo into a repair job
- Skipping grout removal and prying straight at full tiles, which chips adjoining pieces.
- Using too much force too early, which drives the chisel into the subfloor.
- Trying to save every tile, even when the floor is clearly bonded hard. That often slows the job more than it helps.
- Leaving a room full of debris while you work. Loose shards hide edges, scratch finishes, and make footing unsafe.
- Ignoring what is underneath. Old vinyl tile, black mastic, or an unexpectedly soft substrate should stop the project until you know what you are dealing with.
- Working without enough dust control. Even a modest bathroom demo can coat the next room if the doorway is left open.
For older homes, the caution is not theoretical. The EPA advises against sanding or scraping suspect asbestos flooring, so if you uncover an older layer you do not recognize, testing beats guesswork every time. And if the floor is simply too large or too stubborn, remember that removal-only labor in the U.S. commonly starts around $1 to $4 per square foot before patching or new installation. Once the tile is gone, the job is not finished; it just changes shape.
When I would hand the job to a pro
I do not reach for outside help on every tile tear-out, but I do when the floor starts telling me the demo is only half the problem. That usually means a thick mortar bed, a badly damaged subfloor, hidden heat wires, or a bathroom that would take all weekend just to clear the thinset. In those cases, paying for removal can be the cleaner decision because the time and risk are real, not imagined.
- Call in help if the room is large and the tile is firmly bonded from wall to wall.
- Call in help if the subfloor is soft, swollen, or squeaky before you start.
- Call in help if you uncover a layer you cannot identify with confidence.
- Call in help if the dust load or disposal burden is more than your space can handle.
For the rest of the jobs, a controlled start, shallow leverage, and disciplined cleanup are enough to get the floor down without tearing the room apart. That is the part I care about most: not just removing tile, but leaving a floor that is ready for the next finish.
