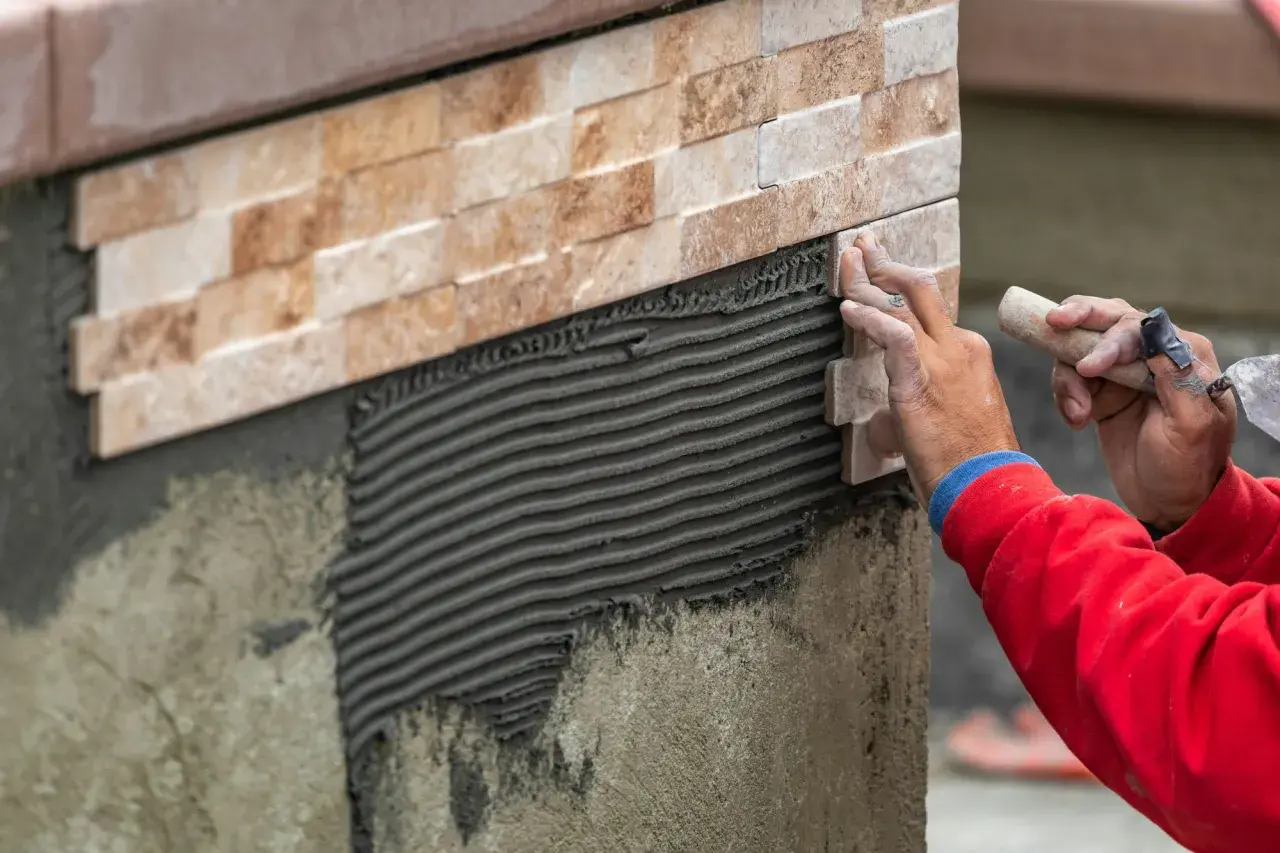
Stone on a wall can look clean and expensive when the installation is done right, but it is unforgiving of shortcuts. The practical answer to how to install stone tile on wall projects is to start with the substrate, choose the right mortar, then keep coverage, alignment, and moisture control tight from the first row to the last. I’m walking through the parts that actually matter in a bathroom, backsplash, or feature wall so you can avoid the failures that usually show up later.
A sound wall and full mortar contact do most of the work
- Prepare the wall first. Stone shows every dip, hump, and weak spot.
- Use the right mortar. Non-sag or large-and-heavy tile mortar is often the safest choice for wall stone.
- Back-butter and verify coverage. Natural stone needs full support, especially in showers and other wet areas.
- Seal at the right time. Porous stone may need a pre-seal before grouting and a final seal after curing.
- Do not force movement joints shut. Corners and changes of plane need flexible sealant, not hard grout.
Start with the wall you actually have
Stone reveals flaws that ceramic can sometimes hide. If the wall bows, cups, or has patched areas that are still uneven, those defects show up as lippage and wandering grout lines. For larger pieces, I follow the TCNA-style flatness target of no more than 1/8 inch in 10 feet and 1/16 inch in 24 inches; that difference is usually what separates a crisp wall from one that always looks slightly off.
The wall type matters just as much as the flatness. A dry accent wall can use a simpler assembly than a shower surround, and a masonry wall behaves differently from framed drywall. Here is the way I think about it:
| Wall type | Best use | What I watch for |
|---|---|---|
| Drywall | Dry backsplashes and feature walls | Only if it is sound, flat, and not exposed to constant moisture |
| Cement board | Bathroom walls, tub surrounds, shower walls | Seams need mesh tape and thin-set; the board itself is not waterproof |
| Waterproof tile backer or membrane system | Showers and high-moisture areas | Best when moisture control is the priority |
| Masonry or concrete | Direct-bond installations on sound walls | Clean, patch, and flatten before setting tile |
If I’m working on a framed wall, I also think about stiffness. A solid-looking wall that flexes will eventually telegraph that movement into the tile. Once the wall is right, the rest of the job becomes much more predictable.
Choose the mortar and tools that match stone
Stone is heavier and less forgiving than many ceramic tiles, so I avoid generic shortcuts. For most wall stone, I prefer a polymer-modified, non-sag mortar or a large-and-heavy tile mortar, often called LHT. “Non-sag” means the tile is less likely to slide while the mortar is still fresh, which matters a lot on vertical surfaces. On pale or translucent stone, I usually choose white mortar so the bond coat does not shadow through the face.
| Situation | Mortar choice | Why it helps |
|---|---|---|
| Small or medium stone in a dry area | High-quality polymer-modified thin-set | Strong bond and good workability |
| Large or heavy wall stone | Non-sag or large-and-heavy tile mortar | Resists slippage and supports thicker bedding |
| Light marble or other translucent stone | White mortar | Reduces darkening or shadowing behind the tile |
| Shower or other wet wall | Mortar compatible with the waterproofing system | Supports a moisture-safe assembly |
I would avoid premixed mastic for natural stone on a wall, especially in bathrooms. It is the wrong fit for many wet-area details and it does not give me the same confidence under heavier stone. As for tools, keep the list practical: a notched trowel, margin trowel, mixing paddle, level, laser or chalk line, spacers, rubber mallet or beating block, sponge, buckets, and a tile saw or grinder for cuts. If the tile is expensive, I buy more than I think I need. The extra box is rarely wasted.
Once the right mortar is chosen, the next job is layout. That is where most walls are won or lost before the first tile is pressed in place.
Lay out the wall before mixing anything
I always dry-lay at least a few rows before I open the mortar bag. The goal is not just to center the wall visually; it is to avoid ugly slivers at the ceiling, tub edge, countertop, or outside corner. In a bathroom, the eye goes straight to the mirror, the vanity line, and any niche, so those sight lines deserve more attention than mathematical perfection.
My layout process is simple:
- Find the visual center of the wall and mark it.
- Snap or laser a level reference line.
- Dry-fit several rows with spacers so I can see the cut pattern.
- Check where the last full tile lands and adjust if needed.
- Plan cuts around outlets, plumbing penetrations, and edges before I start setting.
If the first row is going above a tub or vanity and the base is not perfectly level, I use a temporary ledger board. It keeps the courses from drifting while the bottom section is built later. On shower walls, that little decision often saves hours of correction.
For corners and changes of plane, I do not plan to grout everything solid. Those joints need movement accommodation, which means flexible sealant later, not hard grout packed into every gap. That detail is small on paper and very visible in the real world if it is done wrong.
Set the stone with full coverage and steady pressure
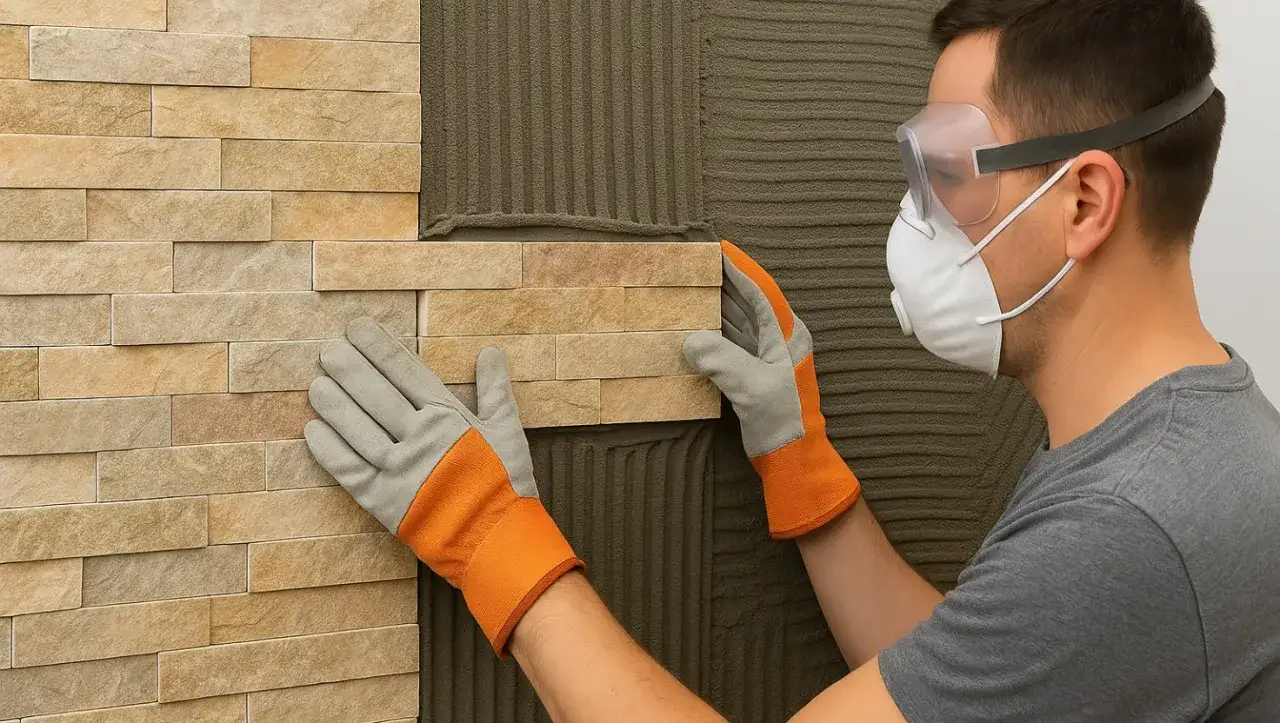
This is the part people imagine when they think about installation, but the mechanics are simple if the prep was done well. I spread mortar in a small section, comb it in one direction, then press the tile into place with enough movement to collapse the ridges. With natural stone, I treat full support as non-negotiable. In wet areas and on stone, I aim for about 95% mortar coverage and I want the edges and corners fully supported.
The steps that matter most are these:
- Key mortar into the wall first. This helps the bond bite into the substrate.
- Comb the mortar in one direction. Straight ridges collapse more evenly than swirled ones.
- Back-butter each stone tile. Coat the back with a thin layer of mortar, especially on textured backs or larger pieces.
- Press and slide the tile slightly. That movement helps eliminate voids behind the stone.
- Check a tile now and then. Pull one up before the mortar skins over and inspect the contact pattern.
- Clean squeeze-out immediately. It is easier than scraping dried mortar later.
Coverage matters more than notch size. A bigger trowel is not automatically better if it leaves ridges that never collapse. If I am getting hollow areas, I change the trowel angle, back-butter more aggressively, or step up the notch size. I do not guess. I test a tile and read the back.
On a wall, lippage control matters too. Even a slight edge mismatch becomes obvious once light hits the surface at an angle. Leveling clips can help on larger stone, but I treat them as a tool for consistency, not as a fix for a crooked substrate. If the wall is wrong, the clips will not save it.
Grout and seal with the stone in mind
After the mortar cures, I move to grout with the stone finish in mind. Many wall jobs can be grouted after about 24 hours, but cool rooms, heavy pieces, or thicker mortar beds can need more time. I always follow the product directions rather than forcing the schedule. For polished or softer stone, I also pay attention to the grout texture, because a coarse sand can scratch delicate faces.
Porous stone can stain easily, so pre-sealing is worth considering before grout goes in. I do not pre-seal every stone automatically, but I do test a spare piece or an offcut first. A pre-seal can make grout cleanup easier and reduce staining on open-pore surfaces. After the grout has cured, a final seal is often a smart move for natural stone and grout lines that need ongoing stain resistance.
| Stone type | My default approach | Why |
|---|---|---|
| Marble, travertine, limestone | Test a pre-seal, then seal again after grouting if needed | These stones are often porous and easy to mark |
| Slate | Seal based on how absorbent the face is | Surface texture varies a lot from piece to piece |
| Granite, quartzite | Often less frequent sealing | Denser stone usually absorbs less |
When I grout, I wipe diagonally, keep the sponge only damp, and avoid flooding the surface. Too much water dulls the grout and can drag pigment out of the joints. Once everything cures, I finish change-of-plane joints and corners with a flexible sealant instead of rigid grout. That one habit prevents a lot of cracked lines later.
With stone, the finish is not just about appearance. It is about protecting the bond and making maintenance realistic for the person who has to live with the wall.
The mistakes that cost the most time and money
The expensive mistakes are rarely dramatic. They are usually small choices repeated across a whole wall. Spot-bonding stone, setting over a wall that is not flat enough, using the wrong mortar, or rushing grout and seal steps can all leave a wall looking fine on day one and failing later.
- Spot-bonding or using mortar dabs. It leaves voids and weak support behind the stone.
- Ignoring flatness. Stone does not hide waves the way flexible finishes sometimes do.
- Letting mortar skin over. Once it loses tack, the bond gets unreliable.
- Using the wrong backing in a wet zone. A shower wall needs a proper moisture strategy, not just a hard surface.
- Grouting movement joints. Corners and plane changes need flexibility.
- Over-wetting the surface during cleanup. That can stain or weaken the finish.
- Choosing gray mortar under pale stone. It can create unwanted shading, especially with translucent material.
I call in a pro sooner rather than later when the project involves a shower ceiling, an exterior wall, very large stone panels, a badly out-of-square frame, or a substrate with structural movement. Those are not the jobs where I want to gamble. The cost of a second pass is usually higher than the cost of doing it correctly the first time.
The small checks that make the finished wall feel built in, not patched on
If I had to boil the whole project down to a few habits, I would keep them simple: flatten the wall, use the right mortar, back-butter the stone, and check coverage while the mortar is still fresh. Everything else supports those four decisions. The wall will also age better if you keep ventilation good in bathrooms, let the materials cure on their own schedule, and save a few extra tiles for future repairs.
- Look at the wall from the side and confirm the lines stay straight under grazing light.
- Tap a few tiles and listen for hollow spots.
- Check that corners and perimeter joints are flexible, not hard-grouted.
- Keep the room ventilated while sealer and grout cure.
- Store spare pieces from the same lot for later touch-ups.
That is the part I would not skip in a bathroom or feature wall: the details that do not look dramatic in progress but decide whether the stone still looks intentional years later.
