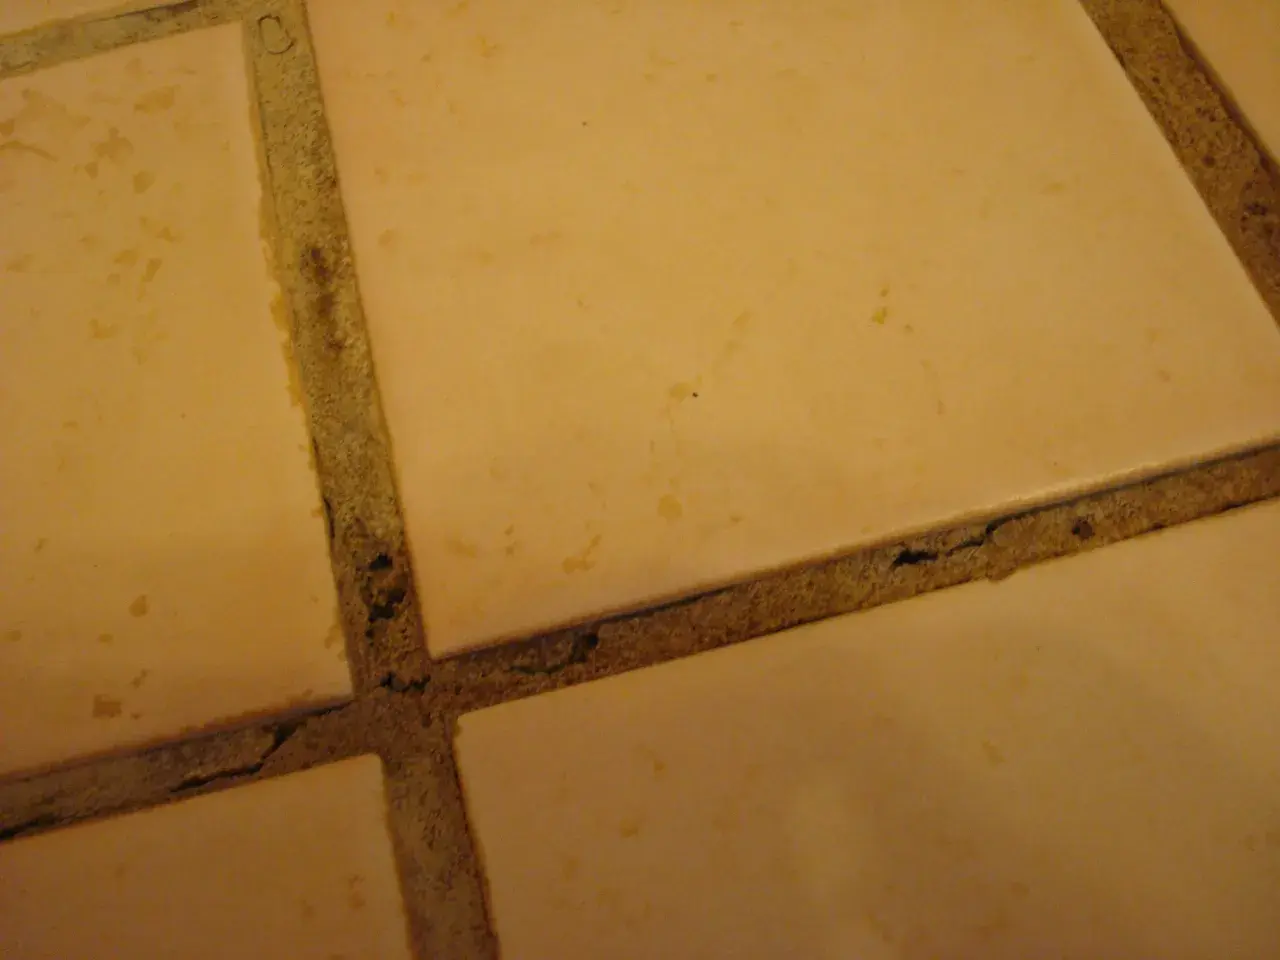
The fastest way to judge a cracked shower joint
- Hairline cracks in the middle of a grout line are often repairable, but recurring cracks usually mean movement under the tile.
- Corners, shower curbs, niches, and wall-to-floor transitions should be caulked with flexible sealant, not filled with grout.
- Basic cement grout is the most crack-prone; epoxy and high-performance grouts handle moisture and wear better, but they do not replace waterproofing.
- Sealer helps with staining and cleanup, but it will not stop a moving joint from cracking again.
- Professional shower regrouting usually runs about $600 to $2,500, with add-ons for caulking, waterproofing, or tile repair.
Why shower grout cracks in the first place
I usually separate shower cracks into two camps: a joint problem and a movement problem. Grout is rigid, while a shower assembly expands, contracts, and flexes a little every time hot water hits the tile and the structure underneath changes temperature.
The most common causes are simple but important. A crack can appear when grout was used where a flexible joint should have been, such as corners, benches, curbs, niches, or the wall-to-floor transition. It can also show up when the substrate moves, the tile bed is not stiff enough, grout was mixed too wet, the grout joint was not packed fully, or the material cured too fast in a hot, dry, or drafty room.
There is also a bigger picture here: grout is the finish layer, not the waterproof layer. If the shower was built without enough movement accommodation or with weak waterproofing behind the tile, the crack is often the first visible warning.
Once you accept that grout is often reacting to what is happening underneath it, the next step is learning how to read the crack itself.
How to tell a small surface crack from a real shower problem
Not every crack means a teardown, but the pattern matters more than the line length. A single hairline crack in the middle of a grout field is usually less serious than repeated cracking in the same corner or a joint that keeps reopening after repair.
| What you see | What it usually means | How I read it |
|---|---|---|
| Hairline crack in a straight field joint | Minor shrinkage or a one-time grout failure | Often repairable if the tile is solid and the crack stays isolated |
| Crack at a corner, curb, niche, or bench | A change-of-plane joint was grouted instead of caulked, or the joint is moving | Use flexible sealant, not more grout |
| Crack with loose, hollow, or shifting tile | Substrate movement or bond failure behind the tile | Surface repair alone will not last |
| Crack plus staining, musty odor, or damp drywall nearby | Water intrusion may already be happening | Inspect the assembly before you patch anything |
If I press on the tile and it moves, or if the crack returns after a quick cosmetic fix, I stop treating it as a grout issue and start treating it as a shower system issue. That distinction is what separates a lasting repair from a temporary patch.
Once you know which category the crack falls into, choosing the right repair gets much easier.
The repair that matches the problem
The biggest mistake I see is people trying to solve every crack with the same product. A shower needs different materials in different places, and the location of the joint matters as much as the crack itself.
| Repair path | Best for | Typical U.S. cost | Limitation |
|---|---|---|---|
| Spot regrout | Isolated crack in a sound field joint | $50 to $150 for a minor crack or spot repair | Fails again if the joint is moving |
| Professional shower regrouting | Widespread worn or cracked grout in a sound shower | About $600 to $2,500 | Does not fix hidden movement or waterproofing failures |
| Silicone caulk at changes of plane | Corners, curbs, niches, benches, and wall-to-floor transitions | Often a smaller add-on repair rather than a full regrout | Should not be used to fill standard field grout joints |
| Tile repair or retile | Loose tile, repeated cracking, or moisture damage | Roughly $200 to $300 for a few shower tiles, and about $800 to $3,000 for a larger retile | More labor, more disruption, but it addresses root causes |
For corner joints, I prefer color-matched 100% silicone because it moves with the shower instead of fighting it. Mapei notes that caulking is required at changes of plane, and that guidance matches what I see in the field every time: wall corners and similar transitions are not grout joints, they are movement joints.
For field joints, the choice is usually between standard cement grout and a higher-performance option like epoxy or a premium pre-mixed product. Epoxy and similar grouts tend to resist staining and cracking better, but they are less forgiving to install and still do not replace proper waterproofing behind the tile.
The right material is only half the job, though. How you repair the joint matters just as much as what you put back into it.
How I would repair a small crack before it spreads
For a small, isolated crack in a sound field joint, I keep the process simple and disciplined. I never smear new grout over a crack and call it done, because that traps a weak line under a fresh surface.
- Let the shower dry completely so you are not locking moisture into the joint.
- Remove all loose grout from the crack with a grout saw, oscillating tool, or other narrow removal tool.
- Vacuum the joint and wipe out dust so the new material bonds cleanly.
- If the crack is in a corner, curb, niche, or wall transition, use flexible silicone caulk instead of grout.
- Pack replacement grout tightly into the field joint, then tool it cleanly before it skins over.
- Keep the shower out of service until the product has cured according to the label.
That last point matters more than most people think. Some pre-mixed grouts allow intermittent shower use after roughly 24 to 48 hours at 70°F, but cool or humid conditions need more time. If you rush the cure, you can weaken the joint before it ever gets a fair chance to perform.
I also treat sealing as maintenance, not rescue. A sealer can make cement grout easier to clean and more resistant to stains, but it will not stop movement or make a cracked joint magically stable.
With the repair method clear, the next question is whether the material in the shower is giving you the durability you actually need.
Why material choice matters more than most people think
I think of shower grout in terms of performance, not just color. Two showers can look identical on day one and age very differently because the grout chemistry, joint design, and waterproofing strategy are different.
| Material | Where it works best | What it does well | What to watch for |
|---|---|---|---|
| Cement grout | Standard field joints in typical showers | Affordable, familiar, easy to color-match | More prone to shrinkage, staining, and surface cracking |
| Epoxy grout | Busy family showers and high-wear areas | Very low absorption, strong stain resistance, less maintenance | Higher cost and less forgiving installation |
| Ready-to-use grout | Projects where convenience and consistency matter | No mixing, consistent color, easier cleanup | Not ideal for every tile shape or submerged application |
| 100% silicone caulk | Corners, curbs, niches, benches, and tub-to-tile transitions | Flexible, crack-resistant, designed for movement | Not a field-joint grout replacement |
My rule of thumb is simple: if the joint is supposed to move, I want silicone; if the shower is likely to see constant moisture and heavy use, I look harder at epoxy or another high-performance grout; and if the problem is structural, I stop expecting any grout to solve it on its own. No grout is a substitute for waterproofing.
That leads directly into prevention, because the best repair is the one you do not have to repeat.
How to keep the crack from coming back
The long-term fix is rarely just stronger grout. It is a better shower assembly and a better habit of maintenance.
- Use caulk at every change of plane, including corners, curbs, benches, and niches.
- Do not grout over movement joints just because the color match looks cleaner.
- Check for loose tile or hollow sounds before you repair the surface.
- Choose a grout that fits the use of the shower, not just the price point.
- Seal cement grout if the product calls for it, but do not expect the sealer to stop cracking.
- Clean with a mild, pH-neutral product so you are not slowly roughing up the joint surface.
When I see the same line crack again within a short period, I assume the shower is telling me something consistent: movement, not age. Once that happens, the next step is less about touch-up work and more about deciding whether the assembly needs a deeper repair.
When it is time to stop patching and open the wall
There is a point where surface repair stops being efficient. If the crack keeps returning, the tile feels loose, the curb is soft, water has stained adjacent drywall, or you find mold and persistent dampness, I start looking behind the tile instead of at the joint face.
That is especially true around shower pans, niches, and benches, where hidden failures can travel farther than the visible crack suggests. At that stage, the real question is not how to refill the gap, but whether the waterproofing, substrate stiffness, or movement detailing needs to be corrected.
In budget terms, that is the difference between a small repair and a bigger project. A spot fix can be inexpensive, but a full shower regrout or retile is a labor-heavy job, and it is worth paying for if it is the only way to stop repeat damage. I would rather repair the cause once than repaint a symptom three times.
The practical takeaway is straightforward: treat small field cracks early, use caulk where movement belongs, and investigate anything that keeps coming back. That is the cleanest way to protect both the tile surface and the structure behind it.
