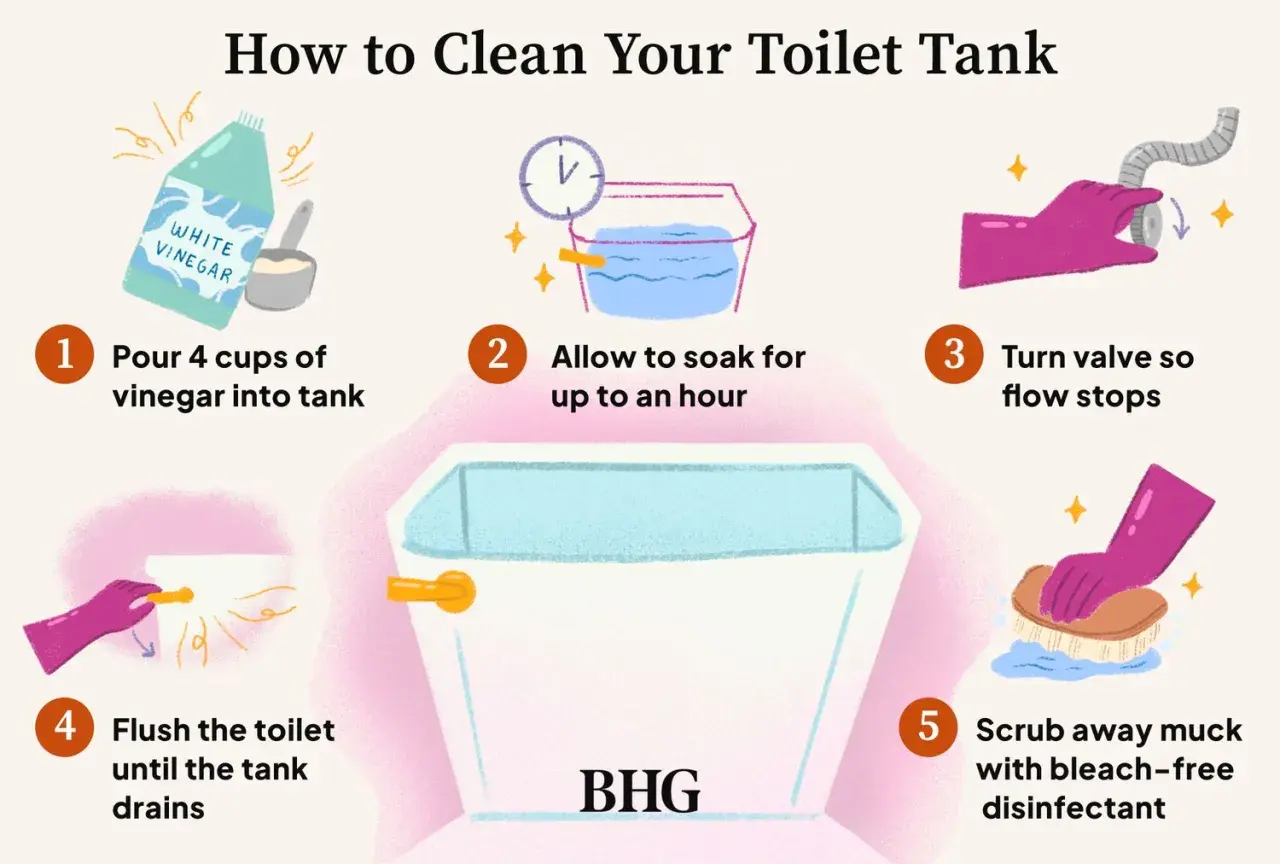
A dirty toilet tank can cause more than a bad smell. Mineral film, rust, and neglected rubber parts can affect flush performance and slowly wear down the internal hardware. This guide explains how to clean toilet tank interiors safely, what really works on buildup, and which products I leave out because they do more harm than good.
I'm keeping the process practical: simple tools, gentle cleaners, and a routine that makes sense for most U.S. homes, especially where hard water is common. If you clean the tank the right way, you protect the flapper, fill valve, and seals while keeping the whole toilet fresher for longer.
The tank stays cleaner when you use gentle cleaners and stop buildup early
- Turn off the water and flush the tank empty before scrubbing anything inside.
- Use a soft brush, sponge, and microfiber cloth rather than abrasive pads or steel wool.
- White vinegar helps with mineral film, but I keep the soak controlled and rinse well.
- Avoid bleach tablets, strong acids, and anything that can attack flappers or seals.
- Plan on cleaning every six months, or every three months if hard water is a problem.
What I check before opening the tank
Before I touch the water line, I look at the tank as a small mechanical system, not just a dirty container. The flapper, fill valve, float, overflow tube, and gaskets all need to keep working after the cleaning is done, so I start gently and avoid anything that can dry out or etch those parts.
I also check whether a tank tablet is already in place. If it is, I remove it before I add anything else, because mixing cleaners is where most avoidable problems begin. I also want the water supply valve to turn easily and shut off fully, since a stuck valve makes the job much harder than it needs to be.
- Shut off the water supply at the wall valve.
- Flush once or twice to drain most of the tank.
- Keep gloves nearby if you see rust, grime, or moldy residue.
- Open a window or switch on the fan so the bathroom does not hold cleaning fumes.
- Never combine bleach with vinegar, rust remover, or any acid-based cleaner.
Once those basics are in place, the actual cleaning takes only a few minutes, and the next step is choosing the right method for the type of buildup you see.
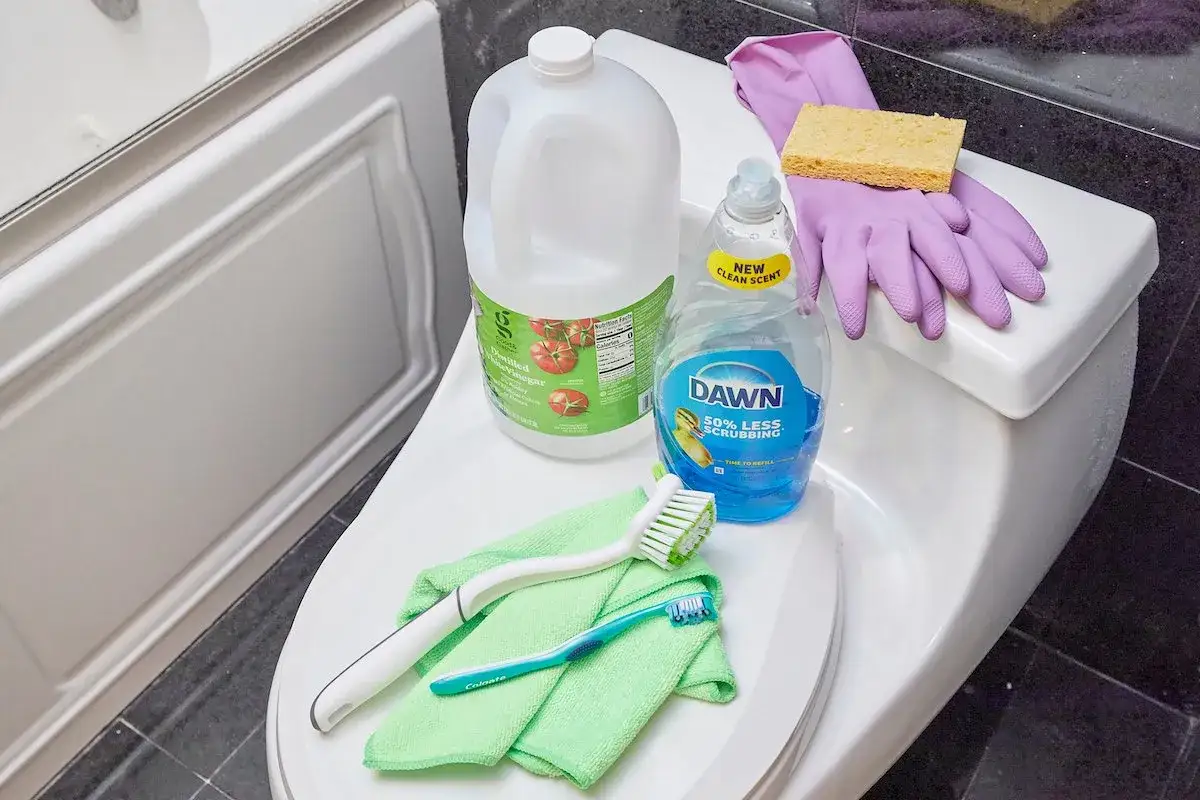
The step-by-step cleaning routine I use
For most toilets, I keep the process simple: drain the tank, loosen the grime, scrub the surfaces, and rinse thoroughly. That order matters because it lets the cleaner work on the mineral film instead of getting diluted in standing water.
- Turn off the water supply and flush until the tank is nearly empty.
- Use a sponge or small cup to remove the last bit of water from the bottom.
- Wipe loose dust and slime from the walls, lid underside, and corners with a damp microfiber cloth.
- Add a cleaning solution that matches the problem. For light film, I use white vinegar. For routine grime, I use warm water with a few drops of mild dish soap.
- Let the solution sit for 15 to 30 minutes. If the buildup is heavier, I may stretch that to about an hour, but I do not leave acidic cleaner in the tank all day.
- Scrub the porcelain walls, the base of the tank, and around the overflow tube with a soft nylon brush or an old toothbrush.
- Pay attention to the fill valve, flapper, and chain, but do not force them. I clean around those parts instead of prying them apart unless a part clearly needs replacement.
- Wipe up the loosened debris, turn the water back on, and flush two or three times to rinse the system.
If the tank still looks cloudy after the first pass, I repeat the rinse and scrub rather than moving straight to harsher chemistry. That usually gets better results and keeps the internal parts in better shape, which brings us to the products that are actually worth using.
What I use for stains, scale, and odor
Not every tank problem needs the same cleaner. A dusty tank, a musty tank, and a tank with hard-water crust are three different jobs, and I choose the least aggressive option that will still do the work.
| Cleaner | Best for | How I use it | Watch-outs |
|---|---|---|---|
| White vinegar | Mineral film, mild odor, light residue | Let it sit for 15 to 60 minutes, then scrub and rinse well | Do not mix it with bleach or rust remover, and do not leave it in longer than needed |
| Mild dish soap and warm water | General grime and surface dirt | Wipe the tank walls and parts with a soft cloth, then rinse | It will not dissolve heavy scale on its own |
| Bleach-free bathroom disinfectant | Sanitizing after a drain and scrub | Use only if the label says it is safe for the surfaces and parts in the tank | Check compatibility with rubber seals and tank hardware |
| Tank-safe descaler | Stubborn hard-water buildup or rust stains | Follow the label exactly and rinse thoroughly afterward | Use only products that explicitly say they are safe for toilet internal parts |
For a lot of homes, vinegar handles the everyday problem and a soft brush does the rest. If the deposit is thick enough to feel gritty, I slow down and let the cleaner work instead of scrubbing harder, because force rarely fixes scale faster.
What not to put in the tank
This is the part I take most seriously, because the wrong product can shorten the life of the flapper, seal, or fill valve long before you notice a visible problem. A clean-looking tank is not worth a cracked rubber part or a stuck mechanism.
- Bleach tablets or drop-in cleaners that sit in the tank water for long periods.
- Steel wool, abrasive powders, and harsh scrubbing pads.
- Bleach mixed with vinegar, rust remover, or any other acid.
- Strong drain cleaners that are designed for pipes, not toilet components.
- Colored deodorizers or unknown tablets unless the manufacturer says they are tank-safe.
I'm also cautious with overnight soaks. A short vinegar soak is usually enough for mineral film, but I do not leave any cleaner in the tank for days on end. If the toilet is older or the rubber parts already feel brittle, shorter contact time is the safer choice.
That warning leads naturally to timing, because a tank that is cleaned on the right schedule rarely needs aggressive treatment in the first place.
How often I clean the tank and when I do it sooner
For most households, I treat tank cleaning as a semiannual job. In hard-water areas, I shorten that interval because scale starts building much faster than most people expect, especially around the flapper and the waterline.
| Condition | Cleaning interval | Why it matters |
|---|---|---|
| Soft water, light use | Every 6 months | Enough to stop grime before it becomes visible buildup |
| Hard water or frequent use | Every 3 months | Helps prevent scale from coating the internal parts |
| Older toilet with wear on rubber parts | Inspect monthly, clean as needed | Lets you catch leaks, slime, or sticking parts early |
| After a long vacancy or plumbing repair | Clean before normal use resumes | Flushes out stagnant water and loose debris from the system |
I clean sooner if I see white crust, rust streaks, floating debris, or a flapper that feels gummy. A slow refill cycle or a tank that smells stale when the lid comes off is another sign that the next cleaning should not wait.
If the smell persists after the tank is clean, I do not automatically blame the toilet tank itself. Sometimes the odor is coming from the bowl, the wax ring, or the venting, and that is a different problem entirely.
Small habits that keep the next clean easier
Most tank messes are preventable once the interior is clean. I get the best results from small habits that reduce mineral exposure, keep rubber parts in good shape, and make the next inspection quick instead of tedious.
- Check the flapper and gasket every few months and replace them if they crack, swell, or stop sealing.
- Flush the toilet a few times after any repair so loose debris does not stay trapped in the tank.
- Skip in-tank tablets unless the toilet maker specifically approves them.
- Use a water softener or another scale-control strategy if hard water is a constant issue in your home.
- Keep a small brush and microfiber cloth in the bathroom cabinet so the next light cleaning is easy to start.
The goal is not to make the tank spotless forever. It is to keep buildup low enough that a routine clean stays simple, the parts keep moving freely, and you do not end up replacing hardware sooner than necessary. For most homes, that means a careful clean every six months, a shorter cycle in hard-water areas, and a steady habit of using the mildest cleaner that solves the problem.
