
The key details that keep the project smooth
- Measure the room from finished wall to finished wall, then confirm drain and supply positions before ordering anything.
- Common vanities are about 18 to 72 inches wide and roughly 30 to 36 inches tall, with comfort-height units near the upper end.
- The easiest installs happen when the new cabinet matches the existing rough-in and the floor is reasonably level.
- Leveling, stud attachment, and sealing matter more than decorative extras if you want the vanity to stay solid and dry.
- In 2026, many projects land around $400 to $2,200, while removal, plumbing changes, and custom work push the total higher.
- Wall-hung units and drain relocations are the two situations where professional help usually pays for itself quickly.
The fit, plumbing, and finish have to line up
Not every vanity swap is the same. A freestanding cabinet usually sits on the floor and gives you a little more forgiveness, while a wall-mounted unit needs structural support inside the wall and a more exact height plan. A double vanity adds width, weight, and plumbing coordination, so it behaves more like a small remodel than a simple replacement.
| Type | Best for | Install note |
|---|---|---|
| Freestanding | Most standard bathrooms | Usually easiest to fit because it tolerates small floor imperfections better. |
| Wall-mounted | Small rooms and modern layouts | Needs blocking or a mounting rail in the wall; drywall alone is not enough. |
| Double vanity | Primary baths shared by two people | Adds width and plumbing complexity, so the rough-in matters more. |
| Integrated top | Low-maintenance refreshes | Fewer seams to seal, but less flexibility if you want to mix components later. |
The right choice depends less on the style photo and more on how much plumbing movement you can tolerate. Once I know the type, I can measure with the right expectations, which makes the rest of the job far less risky.
Measure the opening before you order anything
I start with the wall opening, not the catalog image. Walls are rarely perfectly square, older floors often slope a little, and a vanity that looks right on paper can still fail at the drain by an inch. That is why I measure at more than one point and check the hidden rough-in before I commit to a purchase.
| What to measure | What I check | Practical target |
|---|---|---|
| Wall width | Finished wall to finished wall at the top, middle, and bottom | Leave a little tolerance in older rooms so the cabinet can be scribed or shimmed cleanly. |
| Depth | How far the cabinet will project into the room | Many vanities run around 18 to 24 inches deep, but tight baths often need a shallower profile. |
| Height | Comfort and mirror alignment | Most units sit around 30 to 36 inches tall, with comfort-height options near the upper end. |
| Toilet clearance | Side clearance to the toilet centerline | I like at least 15 inches from the vanity side to the toilet centerline when the room allows. |
| Rough-in | Supply lines and drain location inside the wall | The opening behind the cabinet must accept the existing plumbing without forcing the pipes. |
I also check door swing, drawer pull-out space, and whether any nearby outlet or baseboard trim will interfere with the cabinet. Those are small details, but they are usually the difference between a vanity that feels built in and one that always looks slightly squeezed. With those numbers in hand, the physical install stops being guesswork.
How I install the cabinet without creating future problems
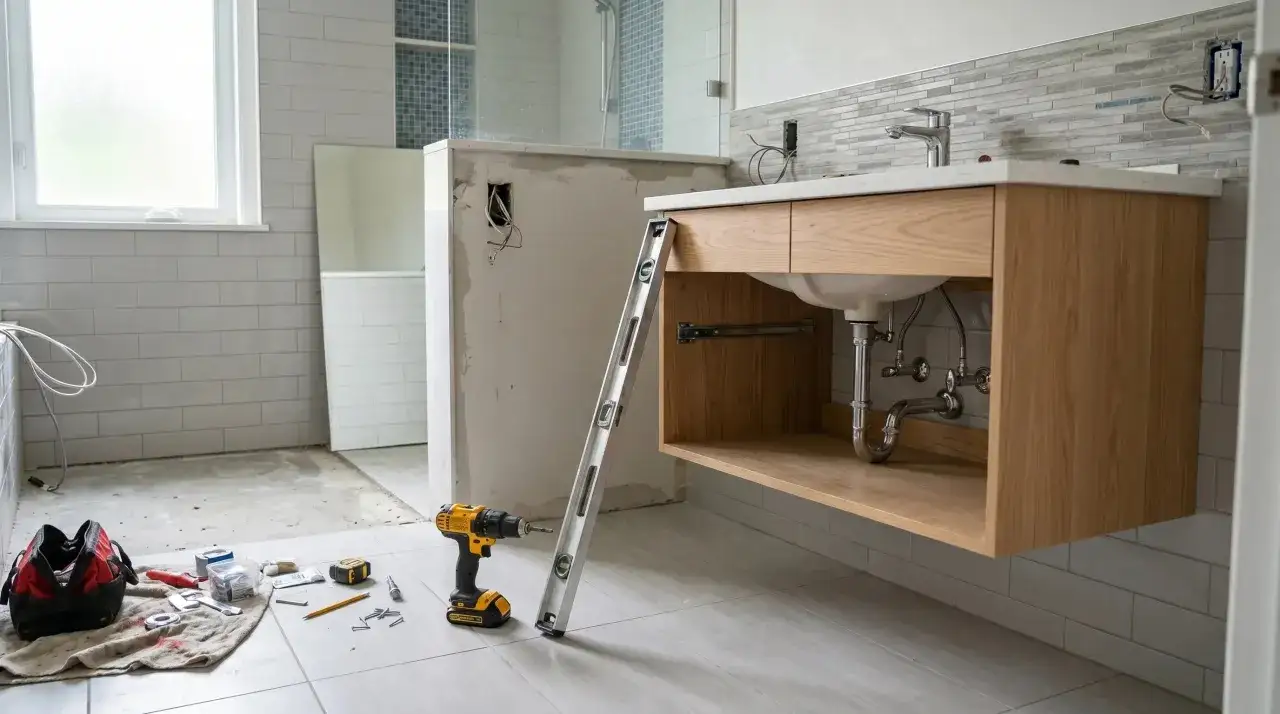
This is the part most people picture, but the order matters more than brute force. I remove the old unit, repair what is exposed, dry-fit the new cabinet, and only then start tightening anything down. If the vanity is wall-mounted, I treat the support structure as part of the project, not an afterthought.
Remove the old unit cleanly
I shut off the water, open the faucet to release pressure, and put a bucket under the trap before disconnecting the supply lines. After that, I cut the caulk line, separate the top if it comes off independently, and lift the cabinet away so I can inspect the wall and floor behind it. If I find rot, stained drywall, or loose flooring, I stop and fix that before a new vanity goes in.
Prep the wall and floor
Once the old unit is out, I locate the studs and check the floor with a level. A small slope can be handled with shims, but a badly uneven floor or a soft spot in the subfloor needs attention first. For a floating vanity, I want blocking between studs or another structural attachment plan before I even think about hanging the cabinet.
Set and anchor the cabinet
I dry-fit the vanity, confirm the plumbing opening clears the rough-in, and then fasten the cabinet into studs. This is where a lot of DIY jobs go wrong: people rely on drywall anchors, but a bathroom cabinet with a sink and countertop needs real support. I also recheck the level from front to back and side to side before I fully tighten the fasteners.
Read Also: Small Bathroom Vanity Colors - Make Your Space Brighter!
Install the top, sink, and faucet
If the sink, faucet, or countertop can be preassembled on a workbench, I prefer to do that because access is easier and the risk of chipping the finish is lower. Then I connect the drain, supply lines, and trap, working carefully so the pipe alignment does not stress the joints. When everything is connected, I run water and inspect the underside before I call the job done.
Once the cabinet is fixed and the water works, the weak points are almost always the joints around the base and the trap underneath.
Leveling, plumbing, and sealing are what make it last
The difference between a vanity that feels solid and one that creaks, leaks, or shifts usually comes down to three things: level, alignment, and sealing. A P-trap is the curved pipe under the sink that holds water and blocks sewer gas; if it does not line up cleanly, the whole install becomes harder to live with. The same goes for the seal at the wall and floor, which has to resist daily splashes and bathroom humidity.
| Problem | Likely cause | What I would do |
|---|---|---|
| Cabinet rocks | Uneven flooring | Shim under the base, recheck level, and then fasten it into studs. |
| Drain misses the opening | Rough-in conflict or a cabinet that is too shallow | Adjust the trap arm or choose a different vanity instead of forcing the pipe. |
| Slow leak under the sink | Loose compression nut or worn washer | Tighten gently, then replace brittle parts rather than over-cranking the joint. |
| Water at the base | Weak seal or splash pattern | Use a proper bathroom-grade seal and keep the room ventilated. |
I also like to wipe every connection with a dry paper towel after the first water test. That makes tiny leaks easier to spot than staring at a joint by eye, and it is often the fastest way to catch a problem before the cabinet goes back into service. Once those details are handled, the remaining questions are budget and whether the project still makes sense as DIY.
What it costs and when DIY stops making sense
For budgeting in 2026, many vanity projects fall between $400 and $2,200, with old vanity removal often adding another $150 to $500. Custom work can climb to about $4,000, especially when the countertop is upgraded, the plumbing has to move, or the wall needs more than a little patching. That is why I never look at the cabinet price alone; the labor and hidden fix-ups often decide the real total.
| Scope | What usually drives the price | Budget note |
|---|---|---|
| Same-location replacement | Cabinet, top, basic labor, and standard plumbing reconnects | Best case for a straightforward refresh. |
| Removal and wall repair | Demo, haul-away, drywall patching, and paint touch-up | Easy to underestimate because the old vanity often hides damage. |
| Plumbing changes | Moving drain or supply lines to match the new cabinet | Usually the point where a plumber is worth the cost. |
| Wall-mounted or heavy-top install | Structural blocking, precise mounting, and lifting the top safely | Better suited to a professional crew in most homes. |
I am comfortable recommending DIY only when the new unit uses the same rough-in, the floor is sound, the cabinet is freestanding, and the top is light enough to handle safely. Once the drain moves, the wall needs blocking, or the subfloor needs repair, the job stops feeling like a weekend project and starts looking like part of a larger bathroom update. The next thing to watch for is the set of mistakes that create avoidable callbacks.
Mistakes I see most often on vanity jobs
The same problems show up again and again, and most of them are preventable with a slower first hour. A vanity can look perfectly centered and still be wrong if the drawer hits the toilet, the trap sits too high, or the cabinet rests on a soft floor that keeps shifting.
- Buying before measuring the rough-in. The cabinet may fit the wall but still miss the drain or supply lines.
- Ignoring floor slope. If the floor drops, the vanity will follow it unless you shim and recheck level.
- Trusting drywall for support. Wall-hung units need structural fastening, not a hopeful set of anchors.
- Forgetting door and drawer clearance. The bathroom door, shower door, and toilet all need breathing room.
- Skipping the leak test. A dry joint at installation can still seep once the cabinet starts settling.
Once I avoid those five mistakes, the job becomes much more predictable, which brings me to the final checks I use before I call it finished.
The last checks I would never skip
Before I pack up, I run the sink for several minutes, then dry every visible joint underneath with a paper towel and look again after the cabinet has had time to settle. I also open and close every drawer, confirm that the doors clear nearby trim, and inspect the base line where the vanity meets the wall or floor. If there is any exposed wood or MDF cut edge, I seal it so moisture has fewer places to creep in.
- Keep the bathroom ventilated after installation so moisture does not work into the cabinet.
- Recheck the trap and supply connections after the first day of use.
- Look at the caulk line again after 24 hours and touch up any gap before it becomes a leak path.
That final pass is what turns a vanity swap into a fixture upgrade that feels intentional, stays dry, and keeps the rest of the bathroom working around it.